Sunday, August 21, 2011

"7 Facts" Blog Game

There is a fun game going around the food blogging community called "Seven Facts." If you get tagged by someone, there are seven questions you have to answer using previous posts from your blog. I was tagged by Isabelle, from Isabelle at Home. Thanks for tagging me, this was fun!

Here are my seven answers based on my previous blog posts and experiences. Click on the recipe title to be taken to the recipe link!

~~~~~~~~~~~~~~~~~~~~~~~~~

1. Most Beautiful Post(s): Caprese Salad (or Skewers)


This was probably the hardest decision I made in this game... I'm not saying that I'm the best chef, nor that I make the best food ever, but I've noticed that the quality of my pictures has been improving since I first started blogging.

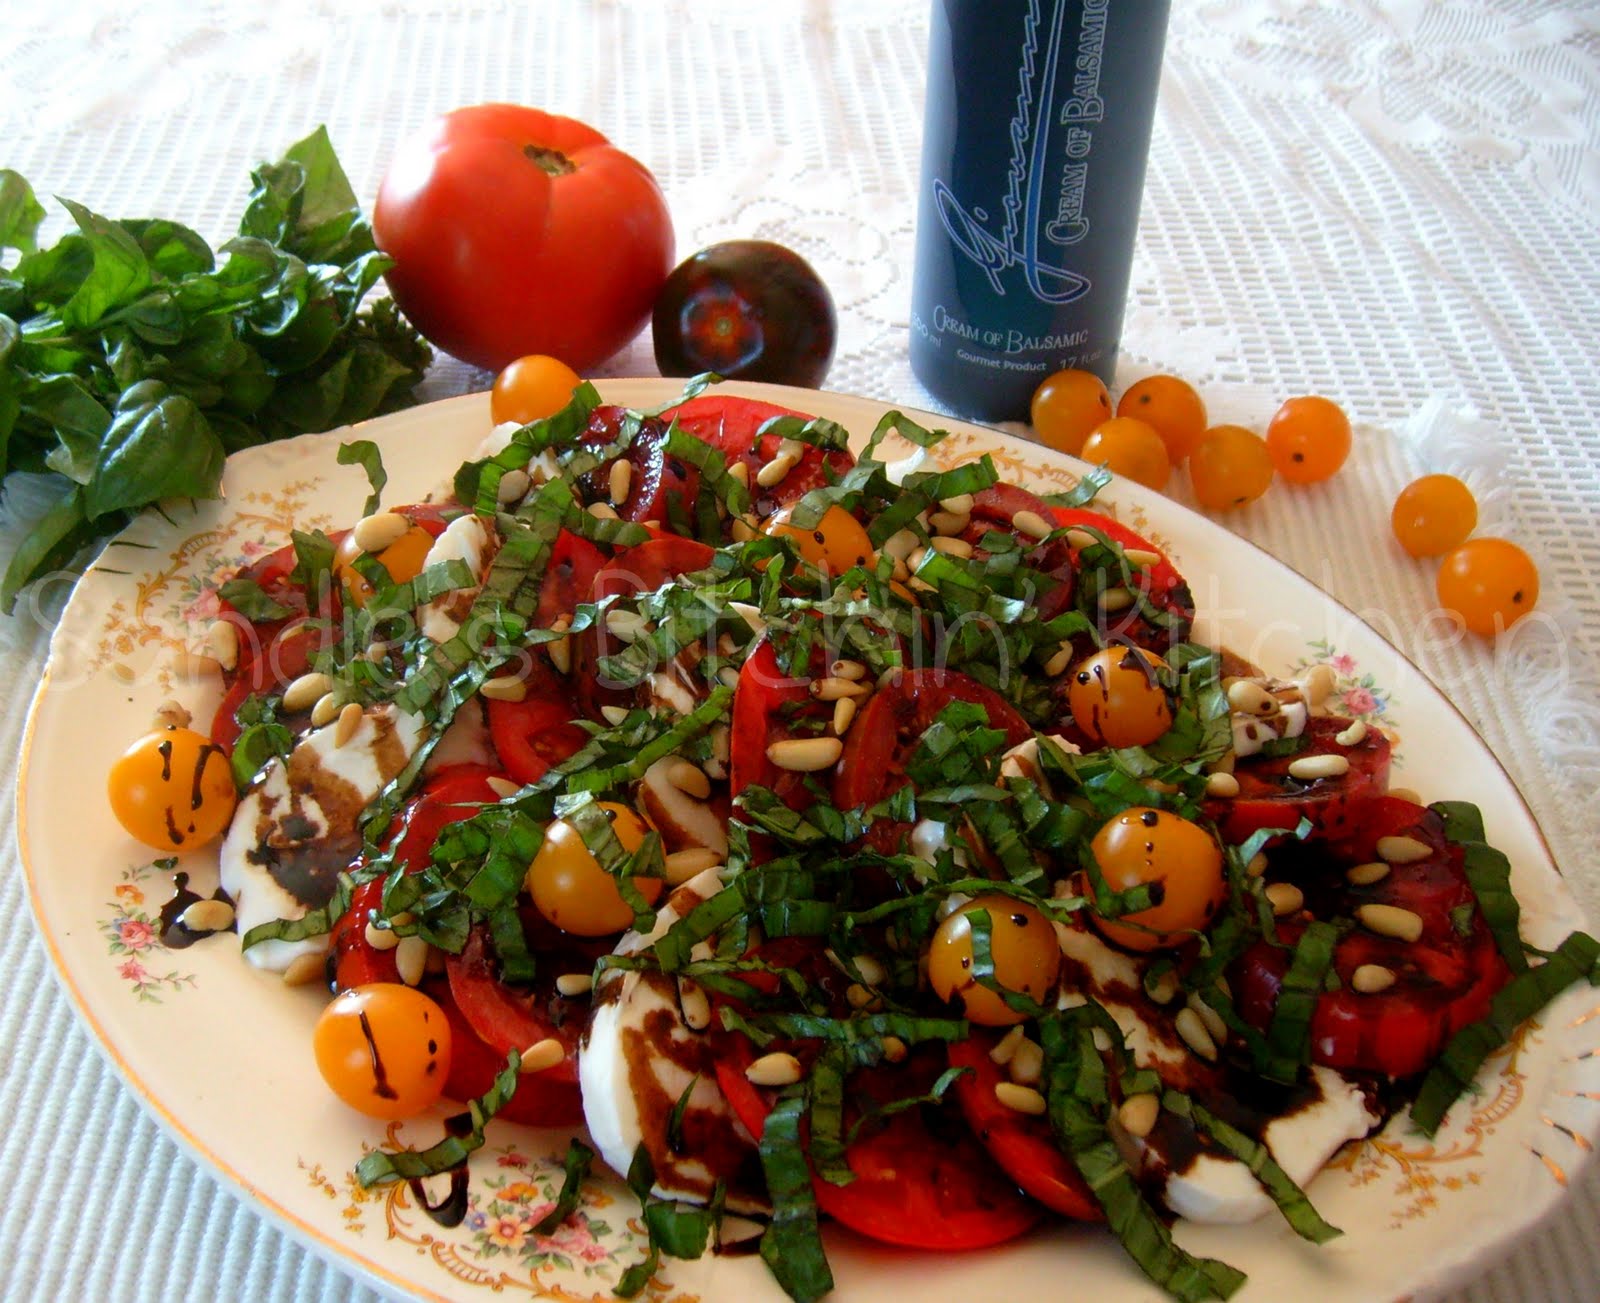
With this, though, it really was a tough decision. I've made some really yummy things in the past year, and some of the stuff turned out really awesome, so it was hard to choose just one... But, I did get it narrowed down to only two, even though I wanted to do four of them! I LOVE Caprese salads more than just about anything. It's the combination of fresh ingredients and flavors, and the little bit of crunch from the pine nuts (in mine), that just send it over the top. And the scallops with the risotto was so divine, I just had to include that too.  :-)


Since this was the easiest one to choose, based on Blogger's nifty little gadget that tells what my most popular recipes are, this was the first one I completed. Technically, the nifty little gadget says that it's another one of my posts, Trio of Sweet Potato Fries, but I don't know where they're getting that... While all of my fries turned out yummy, there really were not very many comments on them. Unless they count how many times people are viewing them. Maybe?

Anyways...

This was my contribution to the National Day for Ribs and Bacon. What a great day that is!!

~~~~~~~~~~~~~~~


Okay, so I don't know if these were actually controversial, but when I was writing up the recipe for them, I imagined all kinds of New Englanders would somehow find my little blog, and this recipe, and attack me like a pack of dogs on a three-legged cat. It's not the traditional lobster roll format, but it's kinda similar... I like that they toast the outsides of the split-top hot dog buns they use for the rolls. And that's what I meant by the style of this sandwich...

...Even now, I can still see ferocious fangs! :-|

~~~~~~~~~~~~~~~

4. Most Helpful: Honey Ginger Salmon


This is another one of those recipes that didn't get a lot of attention, because it was back in my earlier days of blogging, when only my real-life friends were reading what I wrote. I had recently been told by a fellow blogger about another post that they found especially informative, but I did pack a whole lot of information into this particular post. I try to be as informative as possible when writing up my blogs, so if I forget something or you know something I don't, please feel free to bring it to my attention!

~~~~~~~~~~~~~~~

5. Post That Was Surprisingly Successful: Fish Tacos with Fresh Strawberry Salsa and Chipotle Crema


Perhaps it's because I have so many friends who just can't get their minds around the concept of fish tacos, but I was pleasantly surprised by how popular this was with my fellow foodie bloggers. Apparently, when people hear "Fish Taco," they think of a regular chicken or beef taco, only with fish, with the same spice mixture and everything. *Shudder* I suppose if that were my preconceived notion, I would have a hard time getting past that too... But, they really are very yummy!

~~~~~~~~~~~~~~~

6. Post That Didn't Get The Attention It Deserved: Tarragon Chicken Salad


This is, by far, my favorite chicken salad recipe. The "problem" was that I posted this at the beginning of my blog, when I was just getting started with all of this, and so not a lot of people really saw those earlier posts. One of my residents gave me this recipe, and she was so happy when I would make it and bring some in for her... She was always watching Food Network, especially Barefoot Contessa, and then telling me all about what she saw "Contessa" make in hopes that I would make it and bring some for her! She was a dear, sweet lady.

~~~~~~~~~~~~~~~

7. Post I Am Most Proud Of: French Onion Soup


I am the most proud of this post/recipe, because it was one of my first real attempts at making a recipe my own and it's been so successful. Everyone I've ever made this for raves about how good it is, some even going so far as to say it's the best French Onion Soup they've ever had! This was one of my papa's favorite things, and he absolutely loved it, so this holds a special place in my heart...

~~~~~~~~~~~~~~~~~~~~~~~~~

Thank you so much to Isabelle for including me in this fun game. And now to choose 7 of my favorite food blogging friends to play too... These guys have shown me so much love and support, I can't even begin to thank them enough. Be sure and check out their pages!

Becca at It's Yummilicious
Chelsea at Sprinkles of Parsley
Kelly at Eat Yourself Skinny
Chef Dennis at A Culinary Journey with Chef Dennis (I'm still wanting to call it by your old name!)
Janet at From Cupcakes to Caviar
Christina at Sweet Pea's Kitchen
Amy and Tiffanie at Chicks Who Love To Eat

Thursday, August 18, 2011

Caprese Salad (or Skewers)

Does anything say summer more than fresh garden tomatoes? Well, besides grilling out, picnics at the beach, water sports, and all of that… But, if you are anything like me, even a little, grilling out doesn’t necessarily indicate summer, as I do that all year ‘round. But, tomatoes are a clear indication of summer. I don’t know about anyone else, but I’ve never seen real, delicious, ripe tomatoes in the middle of winter! (I am seriously of the opinion that someone in my community needs to build a greenhouse to grow fresh produce for all of us during the winter months. It could be like a community co-op kind of thing, where you have to pay so much for the privilege of going there or something, but I think it would definitely be worth it. That’s another story, though…) And how could you not feel in a summery mood with such a beautiful, fresh salad like this? I honestly don’t think it’s possible…
Now, I realize that there are about a million of these “recipes” floating around out there, and about a hundred different ways to arrange them, but these are my little concoctions. I’ve even seen stacked Caprese salads! While visually stunning, it seems to be a waste of time and energy… I mean, you can’t eat a giant stack like that without having to disassemble it and everything before eating it. And I like to enjoy my masterpieces just as they are!! But, the fact of the matter is, pretty much every Caprese salad is the same thing. And that’s just fine with me! These things are so delicious, it doesn’t even matter.
One of my recent favorite ingredients is a balsamic reduction. Yes, you very well CAN make your own reduction, and if you want to I am more than happy for you to do just that. However, these days, I have slightly less time for stuff like that… And there are so many genuinely great products on the market, it seems silly to slave over a hot stove all day when you can have someone else do that for you! The only thing I would highly recommend is that you look for a balsamic reduction that says it’s a product of Italy. Not saying that other people don’t know how to make a good reduction or anything, but it’s a well-known fact that Italians know a thing or two about good balsamic vinegar. The one that I use, and really like, is called Cream of Balsamic and is imported by Isola Imports, which a local gourmet cheese store in my area carries. These guys have a lot of really great products, so I would definitely recommend checking them out, when you have time! (And, no, I am not being paid to say that, nor have I received any other kind of compensation for telling you about them. It’s just a great product and I want to share it with all of you! :-))
As for the basil, that is my favorite herb and I probably overuse it, according to some people’s standards. So, I didn’t give an amount for that, because I want you guys to use as much or as little as you like… The same goes for the pine nuts; use as much or as little as you like. And here’s the thing about pine nuts - they taste TERRIBLE if they’re not fresh! I’m sure other nuts are very much the same, but I can’t remember having any other nuts after they’ve gone rancid. And, for some reason, pine nuts are more susceptible to this than others. If you’ve ever been so unfortunate as to have eaten a rancid pine nut, it will make you dislike them more than just about anything. But, they’re really not so bad if they’re fresh! So, I make it a point to take all nuts and stuff like that from the very back of the shelf… The stockers at the grocery store rotate all of the stuff, so the freshest product is always in the back. With highly perishable stuff (even milk and cheese), I prefer it to be as fresh as possible. Even if people do look at me like I’m some kind of crazy lady for digging all the way to the back of the shelf! :-D

Now, for the skewers, I just bought two containers of tomatoes from the grocery store, one of plain red grape/cherry tomatoes and the other the yellow variety. It never hurts to be colorful! When I bought my mozzarella, I hadn’t had plans for what I was going to do with it (it was on sale), so I bought the container of small ones. For this, if I was planning in advance, I probably would have gotten them a little bit bigger, but it’s more than easy to make do with what you have. And you can arrange them on the skewers however you’d like, and even do more on one skewer, but I thought they looked rather pretty this way. You could cut the basil up and alternate it between layers of mozzarella and tomatoes, though… Or you could decide to only do one tomato and one mozzarella per skewer… Whatever you would like to do with your skewers will be more than okay. Be creative! :-)


Printable Recipe

2 large red (or heirloom) tomatoes
2 heirloom tomatoes
16 oz. fresh mozzarella
Extra Virgin Olive Oil
Balsamic Reduction Sauce
Fresh basil, chiffonaded
Pine Nuts
Salt and pepper

Slice the tomatoes approximately ½-inch thick and set aside; slice the fresh mozzarella to the same thickness and set aside. To arrange the Caprese salad, place one of each of the tomato slices together and arrange however you wish, followed by one slice of mozzarella. Continue arranging the tomatoes and mozzarella until you have no more left or run out of room on the plate. Drizzle a little bit of olive oil over the tomatoes and mozzarella, followed by a fair amount of the balsamic reduction. Sprinkle some fresh basil and pine nuts over the top of the salad, followed by the salt and pepper just before serving.

Tuesday, August 9, 2011

Roasted Garlic Aioli

How many recipes are out there for aioli? Hundreds. Thousands. Probably millions. And the one thing I’ve seen in almost all of the recipes, no matter the source, is that you have to do things very precisely or your aioli will not come together. Something about mixing it too long or something, I don’t know… But, I can tell you this - I have tried to make aioli in the past, and it did not come together no matter how long I pureed it in the stinkin’ blender. And I actually did follow the instructions, to the letter, that time! :-)
It wasn’t until I started working at my new job, Fetaz Bistro, that I learned the real secret to making aioli. Now, mind you, this is not the exact recipe for how they make theirs, and I will not divulge that information, but I think the technique is important to know. If you want to try all of the different aioli concoctions at Fetaz, you're just gonna have to stop there whenever you're in the Green Bay area! First of all, contrary to what other recipes state, don’t add anything to the eggs at the beginning of the process. I don’t know if the garlic reacts with the eggs or whatever, but I remember pureeing the crap out of my previous aioli attempt (where I was told to add the garlic, salt, and pepper to the eggs) to no avail. But, somehow, when you start out with just the eggs and oil, it comes together perfectly every time. You really only mix the eggs for a few seconds before starting to add the oil, but you will immediately be able to see that it’s doing what it’s supposed to be doing. No curdled eggs and oil. No weird grainy egg messes. Just perfectly smooth and creamy aioli. Then, when the mixture has come together, add the rest of the ingredients. This is the part where you can play around with flavors and stuff…
Another thing that's important is that you need to make sure you have plenty of eggs in the blender before starting. If you try making aioli in any normal blender with only one or two eggs, it isn't going to come together like it's supposed to. I don't know exactly what the problem was when I tried to make aioli before, but it just did NOT work. It could be that nearly every recipe only calls for one or two egg yolks... It could be that there was too much going on with the egg yolks and they were rebelling... I don't know. But, I do know that this method has worked every single time I've ever done it.
Now, it is important to remember that an aioli is not a true aioli without garlic. I like using the roasted garlic because it’s not as overpowering as fresh garlic, and it’s so yummy. If you would prefer, feel free to use fresh garlic. But the garlic needs to be in there, however you choose to incorporate it! I may or may not have cheated and bought the already peeled garlic cloves and roasted those (in a small, oven-proof container at 375° with some olive oil, salt, and pepper for an hour or so, until the garlic is a little brown and nice and soft)... ;-)
Now, if you can’t find pasteurized eggs and have an aversion to using raw eggs, you can use the store-bought mayonnaise as a (poor) substitute and get a very similar outcome - one of my friends did this, not knowing what he was actually making, and was more than happy with the results. He’s more chefy than he knew! :-) However, considering that many people eat sunny-side up eggs and raw cookie dough without any adverse effects, I’m going to go out on a limb and say that it isn’t going to be any more unsafe to eat the raw eggs in a sauce that you’re merely going to spread on your sandwich. It’s not like you’re going to eat it by the gallon or anything (and I’m sure I’ve eaten at least that much raw cookie dough), so I feel pretty safe eating it. Not to mention, it sure is tasty!


Printable Recipe

6 egg yolks
2 whole eggs
1⅔ - 2 c. canola oil
1 lemon, juiced
Salt and pepper, to taste
4 heads garlic, roasted

Combine the egg yolks and whole eggs in a blender container, cover, and puree on medium speed just until the eggs are beaten and combined. Remove the cover from the pour spout and slowly drizzle the canola oil into the eggs in a steady stream until the mixture comes together and thickens. Turn the blender off and remove the cover. Pour the freshly squeezed lemon juice into the blender, sprinkle the mixture with salt and pepper, and add the cloves from the roasted garlic. Replace the cover and puree until the garlic is chopped up and everything is thoroughly combined.

Sunday, August 7, 2011

Chocolate Cherry Crisps

Have you ever looked at a picture of food and thought, “I NEED some of that!”? Well, that’s what happened with this… I am an email subscriber for the food blog part of White On Rice Couple, and they posted this last week. Right away, I knew I was going to have to make it! Good thing cherries are on sale… ;-)
Some of you may know, I’ve been working 3 jobs for the past couple of weeks, so this was no easy feat. Thankfully, I am now only working 2 jobs, so will have a little bit more free time to cook and blog again! But, working all of those double shifts all week didn’t thwart my cooking efforts at home… I am more than a little grateful that this was an easy recipe and didn’t take a whole lot of time, because I was able to put it together after getting home from my second job at 9:00PM and before heading to bed so that I could get up for work again at 9:00AM. I even took some to work for everyone for breakfast! :-) I must have been more energetic than normal that night, because I also made two different kinds of aioli while the crisps were baking… (I’ll tell you all about them later!)

Anyways.

Of course, I did do a few things differently when I made the crisps. The original recipe was just one big dessert, which is all well and good. But, I recently acquired a couple of really cute gratin dishes (Thank you, Kohl’s cash!) and wanted to put them to good use, so figured this would be a great way to break them in! I did use the recommended amount of chocolate when I made these, except I used semi-sweet instead of dark, but afterwards decided that a little less would be better. While I do love chocolate, I also love cherries and it seemed like the cherry flavor was masked too much by all of the chocolate. Despite what some people might say, you CAN have too much of a good thing!
Also, I really like nuts in my crisp toppings, so added some of them. It’s kind of funny, because I’m house-sitting for my mom while she’s jet setting around the world, and thought of the nuts at the last minute. I eagerly scoured her kitchen cupboards looking for some walnuts, to no avail. Then, I opened up the refrigerator and in the door found the container of chopped hazelnuts I had brought over for Thanksgiving (or maybe it was Christmas) dinner last year! SCORE!! Not that I am biased or anything, but it was quite tasty… :-D


Printable Recipe

Topping:
¾ c. (100 g) all-purpose flour
¼ c. (50g) packed dark brown sugar
½ tsp. (3g) salt
8 Tbsp. (1 stick) (115g) cold, unsalted butter, cut into small cubes
1 c. (90g) old-fashioned rolled oats (not quick-cooking)
¼ c. chopped hazelnuts, almonds, or walnuts

2 lb. fresh cherries, pitted and halved
¾ c. (180g) semi-sweet mini chocolate chips
¼ c. (50g) granulated sugar
3 Tbsp. (45g) flour

Preheat the oven to 375°. In a large bowl, mix together the flour, brown sugar, and salt. Pinch the butter into the flour, using your fingers or a pastry blender until the mixture is the texture of coarse meal. Add the oats, and use your hands to toss and squeeze the mixture until large, moist clumps form. Transfer to the freezer to chill while you prepare the filling.
In another large bowl, toss the cherries with the chocolate chips, sugar, and flour. Divide the mixture between 4 (0.5-quart) gratin dishes (or transfer the mixture to a shallow 2-quart baking dish), and sprinkle with the topping mixture. Place the gratin dishes on a rimmed baking sheet and bake until golden and bubbling, 20 to 30 minutes (45 to 55 minutes for the larger baking dish). Let cool 10 minutes before serving. Makes 8 servings (or 4… Whatever! Lol)

Monday, August 1, 2011

Fresh Cherry and Seared Sesame Tuna Salad

Now that summer is fully upon us here in Wisconsin, I don’t feel so inclined to actually cook a whole lot for meals. Especially when I spend the majority of my days now in a hot work kitchen! I just have to say… If you think 80° and humid is bad, try standing in front of a wood-fired pizza oven set at 490° AND include the humidity! Or stand over a flat-top stove or grill in that weather! Suddenly, 80° and humid sounds kinda nice… Lol
The heat aside, though, I really do love what I’m doing now. And I want to take the time to apologize to all of my readers for not posting much lately… I started a third job this past week, so I feel like I’ve been running around like a crazy person. I even had to start putting my schedules for all three jobs into the calendar on my cell phone, because I was having such a hard time keeping track of everything! But, I put my two-weeks notice in at one of the jobs, so after this coming Sunday, I will be on a regular schedule and will have a little bit of free time to myself. This means, a little more time to get back to blogging! YAY!!
Also, the past week and a half has been a little hectic around here anyways… My sister is a biology teacher at a high school where we live, and she takes her students to Belize every summer for a week and a half to study the rainforests and all that good stuff. Her husband goes with to help chaperone, so my mom and I watched their two boys while they were gone. Thankfully, Aunt Joanne came to town, from the twin cities, to help out! Believe me, it was definitely needed!!
Being that it’s been so hot and humid out, salads always sound good and so I made this yummy treat one night while we were watching the boys. Mama had taken the boys …somewhere… and then took them to the park to wear them out, and I made dinner while they were gone. The boys had one of their favorites – crescent roll hot dogs – and I made this salad for mama and myself. Everything tasted so fresh, and it definitely hit the spot!


Printable Recipe

Sesame Cherry Marinade:
2 Tbsp. sesame oil
2 Tbsp. soy sauce
1 Tbsp. balsamic vinegar
1 clove garlic, minced
2 c. 100% Montmorency cherry juice

Cherry Vinaigrette:
1 Tbsp. balsamic vinegar
2 Tbsp. 100 Montmorency cherry juice
½ tsp. Dijon mustard
2 tsp. honey
Pinch salt
¼ c. olive oil

1 (8 oz.) tuna steak
1 oz. sesame seeds
Mixed salad greens
4 oz. crumbled Feta cheese
½ lb. fresh Bing cherries, halved and pitted

For the Cherry Vinaigrette: Mix all of the ingredients well, except the olive oil, in a small bowl. Slowly drizzle in the olive oil, whisking continuously, until it is well incorporated. Set aside until ready to use.
For the tuna: Mix the marinade ingredients together and coat the tuna steaks with the marinade, cover tightly, and refrigerate for at least an hour.
Heat a non-stick skillet over medium high heat. When the pan is hot, remove the tuna steaks from the marinade, coat with sesame seeds on both sides, and sear them for a minute to a minute and a half on each side (even a little longer if you want the tuna less rare). Remove the tuna from the pan and slice into ¼-inch thick slices.
Arrange the salad greens in a bowl; sprinkle some of the Feta cheese and halved cherries on top of the greens, top with the sliced tuna steak, and drizzle with vinaigrette.