Saturday, December 1, 2012

Green & Gold Grilled Cheese Sandwiches and Tomato Soup

Tomorrow is game day! And, it’s against one of the Green Bay Packers’ biggest rivals – the Vikings!

Here in Green Bay, we finally got our first real snow fall of the season this past weekend! It wasn't much snow, but it was enough to cover the ground and stick for more than 30 seconds. Truthfully, I’m more excited about the snow than the football game… Funny enough, you’d think living in Green Bay would make me a die-hard Packers fan, but that’s not the case. In fact, I’m a Bears fan! (Shhhh! Don’t tell these crazy people!!  ;-)) Although, when my friends ask me to go to a game with them, I try to be a good sport and show some team spirit…


Or, I just like to have any excuse to wear a tutu!!  :-D

I was recently contacted by a man named Brian from the Campbell’s Soup Company, asking if I would be interested in tasting and reviewing one of their newer soups, the Sun-Ripened Yellow Tomato Soup.


While doing this project, I even learned a few things about Campbell’s and the history of condensed soups!


When Brian and I initially talked about this project, he thought it would be kind of fun if I did a play on the classic Grilled Cheese and Tomato Soup combination, but make it Packers-themed. I thought it was definitely a cute idea, and immediately called Ledgeview Gardens and asked if they had any of their yellow tomatoes available. Confirming that they did indeed have some, I headed over there immediately and picked up my tomatoes and some fresh basil.
After going to Ledgeview Gardens, I ran to the grocery store to get the rest of my ingredients, namely the cheese. Living in Wisconsin, we’re pretty lucky because we have probably more cheeses than most people even know about, and they’re readily available at most supermarkets in the larger cities. One of the Wisconsin-local grocery stores, Woodman’s, has probably the most diverse of collection of cheeses of all the stores I've been to, and they carry a lot of Wisconsin-made cheeses. I’m particularly fond of the Belgioioso brand of cheeses, as they consistently produce a great-quality cheese and they’re reasonable priced. For this particular project, I decided to use a Burrata cheese, which usually comes packed in water and is like regular mozzarella on the outside and then has shreds of mozzarella combined with cream on the inside. It’s super soft, but really delicious! I cut the Burrata in half and then scooped out the mozzarella and cream interior to spread on my sandwich, but you can easily substitute regular fresh mozzarella cheese sliced thinly.
Because yellow tomatoes are very mild and much less acidic than their red counterparts, I didn't want to use a cheese that would be too strong and that would overshadow the tomato’s flavor. And since their flavor isn't entirely strong, I also roasted some of them for my sandwiches, to help pronounce their flavor a little more. If you’d like even more flavor, you can always add some dried basil with the salt and pepper, just before roasting the tomatoes, but I really wanted the tomato to shine this time.
As for the soup… It really did have a nice flavor, but I must admit that I actually like the acidity and extra flavor of the red tomatoes. I’m one of those weird people who can (and does) eat tomatoes like an apple, with just a little bit of salt on them! So, for me, I really liked the added flavor dimension that the freshly chopped basil and the basil oil added to the soup. But, if you’re one of those people who can’t eat tomato products because of the high acidity, I would definitely recommend trying this out!


Printable Recipe

2 large, ripe, yellow beefsteak tomatoes
Salt and pepper
Canola or olive oil
1 (10.75 oz.) can Campbell’s Sun-Ripened Yellow Tomato Soup
6 slices potato bread
8 oz. ball fresh mozzarella, sliced thin
Fresh basil leaves, optional

Preheat the oven to 350°. Prepare the tomatoes by chopping one of them into small dices, slicing the other one to approximately a ¼-inch thickness; set aside the diced tomatoes. Place the tomato slices in a single layer on a foil-lined baking sheet, sprinkle with salt and pepper, drizzle with a little bit of canola oil, and place in the preheated oven for 10-15 minutes, until the tomatoes have softened and started to brown slightly around the edges. Remove the tomatoes from the oven and set aside to cool slightly.
Add the contents of the canned soup to a medium saucepan, fill the empty can ¾-full of water, and empty that into the saucepan; stir with a whisk to combine everything thoroughly. Heat the soup over medium heat, stirring occasionally, until the soup is heated through. When the soup is hot, add the diced yellow tomatoes, stirring to combine, and remove from the heat.
Meanwhile, preheat a panini press (or George Foreman grill) and assemble the sandwiches; using the basil butter on the outsides of the bread, layer the sliced mozzarella cheese with the roasted tomatoes. Place the sandwiches on the panini press, buttered sides out, and grill until the bread is toasted and golden brown. Remove the sandwiches from the press and allow the cheese to cool slightly before cutting them; cut the sandwiches into small pieces if you’d like, or however you prefer.
Spoon the soup into 3 bowls, garnishing with a chiffonade of fresh basil leaves and/or the basil oil drizzled on top. Serve the soup with the sandwiches or place the “croutons” on top.

Tuesday, November 20, 2012

Herb-Infused Butter and Oil

Wow!! It sure has been a long time since my last blog post! I would like to sincerely apologize to all of my readers for my absence. For quite a while after I started my new job, I was working 60 hours a week, it went back to normal for a couple of weeks, and then I was right back to working 60 hours again. Not only did my blogging suffer, I no longer had the time or energy to go to the gym and I gained back 20 of the pounds that I had worked so hard to lose.  :-(  But, I left that job, as a result of several issues I had with the level of cleanliness in the kitchen (or lack thereof) and the way the owner and management treated the other employees, so am taking some time to recoup from the long work weeks and get back into doing everything I was doing before!
Funny enough, I actually had this blog post typed up and ready to go last week, was just waiting until I took some more pictures, but Microsoft Word crashed and lost the entire document. Strangely, the two documents I typed up AFTER that were saved just fine, but I didn't have a single word of what I had typed up for this. I looked in all of my temporary files and Recovery files, to no avail. Since then, I've been kind of busy, so it took me a little bit to remember everything I had said so that I could type it up again. Stinkin’ technology, it always fails when you need it most!
This blog post is really special to me. Not because of the recipe included, but because it’s the first one I've done in a long time and I've learned a lot about one of the local businesses in the Green Bay area, and I am excited to share it with all of you!


Ledgeview Gardens has been around for several years, and they have some of the best, freshest produce I've eaten. In the summer months, they have plenty of garden space outside and grow a plethora of fruits, vegetables, and herbs in addition to the farm fresh eggs and free-range chicken they sell. I can even buy my squash blossoms from them, instead of scouring the entire market only to come up empty-handed! But, the very best part about Ledgeview Gardens (for me anyways) is that they also have a fair amount of fresh produce even in the wintertime!! After the regular growing season, until around Christmas, you can buy red and yellow beefsteak tomatoes, red and yellow cherry tomatoes, pole beans, a couple varieties of lettuce, garlic, basil, parsley, English cucumbers, winter squash, three different kinds of sweet potatoes, the farm-fresh eggs, and the free-range chicken. After Christmas, they close down to clean out the greenhouse and getting everything ready for the next growing season, and then you’re able to start buying fresh produce again in the middle of May. I don’t know about anyone else, but I am always thoroughly disgusted with the “fake tomatoes” they sell in the supermarkets, so this place is a godsend for me!


As if it wasn't enough that they have this stuff available, their customer service is stellar! The first day I actually drove out to their farm, Darren was kind enough to show me around their facility and explain to me how everything works. Then, I brought my neighbors later that day, and he also gave them a tour and talked to them about everything he had talked to me about earlier. This was especially great, because my neighbors and I had just been talking about cleaning out my spare bedroom and making it into a greenhouse, so that we could have all kinds of fresh vegetables all year long. We had thought we were going to go with a soil method, but after talking to Darren and his dad, Joe, we’re looking at alternative methods – hydroponics and aquaponics. They use the hydroponic method in their greenhouse for the off-season months, and so they were extremely knowledgeable about what we could do in our homes in, but they also know about aquaponics and have been very helpful in helping us to understand what we need to do to get ready for all of it. I have since been there a few times, and they are always happy to answer any new questions I have about setting up a system in my own home and pointing me in the right direction to go about finding the supplies I’ll need.
If you are in the Green Bay area, I definitely recommend looking up Ledgeview Gardens! However, in the summer months, they are much more easily accessible, as they also sell their produce at a couple of the farmer’s markets. But, they are also happy to have you come out to their farm. The only thing I can think of that would make them better… If they started making and/or selling real bacon!  ;-)

What better way to showcase the fresh basil I bought at Ledgeview Gardens than to infuse it in some butter and oil to use later?! I love infusing herbs into oil, because they last a little bit longer and you can drizzle them on top of many kinds of dishes to complement their flavors. This would be great for another recipe I was going to be making...


¼ lb. (1 stick) unsalted butter, softened
½ c. olive or canola oil
Fresh basil, cilantro, parsley, etc.

For the butter: Place the softened butter in a small bowl. If using basil, stack all of the leaves together, roll them up, and cut them into a chiffonade; for other herbs, roughly chop them. Add the herb/herbs to the butter and mix to thoroughly combine; add more herbs, to taste, if you would like more of the flavor. The butter can be used right away or stored in the refrigerator to maintain freshness.
For the oil: Place the leaves of whichever herb/herbs you’re using in the jar of a blender, pour the oil over the leaves, and pulse the mixture until the leaves are chopped into small pieces. If you want more herb flavor, add more leaves to achieve the desired flavor.

Sunday, March 18, 2012

Pistachio, White Chocolate, and Raspberry Trifle

The idea for this trifle came about because yesterday was my brother-in-law Pat’s birthday, and so my nephew Leo (who I teach cooking classes to) and I wanted to make him a special birthday dessert. Pat LOVES pistachios, so I definitely wanted to incorporated them into his dessert somehow, and he’s also rather fond of raspberries. We could have done a pistachio cake with raspberry frosting, but that didn’t seem quite what we wanted. Plus, Leo sometimes has a hard time with focusing - we're working on that in class - so maybe the cake making/cooling part wasn’t such a good idea with him…
I eventually decided on this yummy trifle, after seeing a recipe somewhere for a biscotti with the same flavors. It sounded delicious to me! As it turns out, Chrissy and Pat were planning to take the boys to see a St. Patrick’s Day parade, so cooking class was limited to only 1 hour this time. Because of the time restraint, I made the cakes and pudding ahead of time and then Leo helped me assemble the masterpiece. (Of course, I always let Chef Leo take all of the credit, though!)
The recipe for the cake came from a blog post that sounded wonderful to me. The recipe was passed down through a couple of generations, so I figured it had to be good! I always love recipes that have stories… I had seen a few other recipes for pistachio cake, but some of the ingredients sounded a little strange or they didn’t get good reviews. I was also opposed to adding any more artificial coloring than necessary, so the two packages of pudding mix would definitely help alleviate that particular problem. This cake turned out so wonderfully moist and delicious, I couldn’t help eating the outside edges while I was cutting it into cubes for the trifle! I followed the instructions in the recipe, for the most part, when it came to the ingredients, but I wanted a thinner cake in the end so that I wouldn’t have to worry about cutting it in half and then into bite-size pieces. So, I made the recipe, adding some pistachio extract that I just happen to have, and separated the batter between two 9x13-inch cakes pans. Because I was baking such small cakes, I didn’t want them to brown too fast and adjusted the oven temperature accordingly.

The great thing about making trifles for special occasions is that they look like you put a lot of time and effort into making them. And, if you so desired, you really could do just that! However, they can also be made with help from prepackaged mixes, which works well if you’re short on time and/or if you have children helping you. Focusing on the task at hand can be a little difficult for young minds, when there are 500 other things going on in their brains… (During cooking class, I hear at least 10 different thoughts that are going through Leo’s mind during that time! Angry Birds was a common subject, as I’m the only one in the family with an iPhone which means I “need” to hear all of the relevant news, so I eventually had to ban that topic from cooking class time… Did you know that Angry Birds Space is coming out in the App Store on March 22nd?! No? I’ve been hearing about it for probably a month now!)

In the end, Chef Leo’s masterpiece turned out beautifully, tasted divine, and he received lots of praise and gratitude! He’s such a good little chef!! ;-)


Printable Recipe

Pistachio Cake:
1 box white cake mix
2 (3.4 oz.) pkg. pistachio instant pudding
5 large eggs
½ c. milk
½ c. water
½ c. oil
2 tsp. pistachio extract

3 (3.3 oz.) pkg. white chocolate instant pudding
6 c. milk
2 (6 oz.) pkg. fresh raspberries
½ c. shelled pistachios, gently rubbed to remove skins

For the cake: Preheat your oven to 300° and prepare two 9x13-inch cake pans with cooking spray on the bottoms and sides. In a large mixing bowl, combine the white cake mix and pistachio pudding mixes and stir with a spoon or fork until combined. Make a well in the dry mix and add all of the wet ingredients. With an electric mixer, combine all of the ingredients on low speed for 1 minute; increase the speed to medium and mix for 2 minutes. Divide the cake batter evenly between the two prepared pans, smoothing the batter until even, and place both pans in the preheated oven. Cook the cakes for approximately 35-40 minutes, or until the middle springs back when you touch it lightly, being sure to rotate the pans halfway through to ensure even baking. Allow the cakes to cool completely, and then cut them into 1-inch cubes.
While the cake is cooling, prepare the white chocolate pudding according to the package directions. Place in the refrigerator and allow it to sit while the cake finishes cooling.
To arrange the trifle, place a generous layer of the pistachio cake in the bottom of a trifle bowl, using as much or as little cake as you like. Follow the cake layer with a white chocolate pudding layer, then a generous layer of raspberries (be sure to save some to garnish the top of the trifle), and then a final layer of each of the cake and the pudding. Garnish the trifle with the reserved raspberries and shelled pistachios.

Saturday, March 10, 2012

S'mores Cheesecake

It’s a cheesecake challenge… Bring it on!!

Last night, I had a girls’ night with some of the girls I bowl with on Monday nights, and I was challenged to a cheesecake competition. This has been a standing challenge, as the girl who brought it on has been saying for months that we need to do this so that we can decide, once and for all, who the master of all cheesecake awesomeness is! In all honesty, Nikki had offended me the very first time I ever made cheesecake for them, for the bowling Christmas party, by saying that it tasted like store-bought. I was highly offended, and so when she first mentioned a cheesecake challenge, I knew I was going to have to bring my A-game! Store-bought?! Cheesecake?! When I can make a perfectly delicious one all by myself?! Yeah, this was WAR!!
I’ve gotten to know Nikki much better since then, and she is becoming a very dear friend to me, so there are no hard feelings between us anymore. But, we do taunt each other about our cheesecake-making skills on a regular basis!
When we decided to do a girls’ night, right away Nikki was excited – we could finally have our cheesecake challenge! So, for a couple of weeks now, I’ve been thinking really hard about which cheesecake I would be doing. Since this was all about cheesecake awesomeness, it had to be something good! I still didn’t know what I was going to make until the week of the girls’ night, but had been thinking about a white chocolate raspberry one (one of my personal favorites). I was actually at the grocery store to pick up all of my ingredients when I happened upon the baking isle – Go figure! – and passed an entire section of marshmallows. That’s when the idea came to me… How about a S’mores Cheesecake?! I sent a text message to a couple of my friends, asking them which one they would rather have, and both of them said “S’mores!” Good!! Because that’s what I really wanted anyways, now that I had gotten the idea in my head! This was gonna GOOOOOOOD…
I’ve made my fair share of cheesecakes, since that was our primary dessert at Fetaz, but we didn’t usually do a lot of chocolate ones. We swirled a lot of fruit purees into them, made toppings for them, but we didn’t do chocolate very often. I did make a Black Forest Cheesecake for my birthday last year, but I had thought it was too dense and rich for what I wanted now so decided to melt the chocolate with heavy cream, as you would for ganache, and add that to the batter. But, I was a little worried that doing this would dilute the chocolate flavor too much, so I searched the internet for chocolate cheesecakes and saw that a lot of people also added cocoa powder to their chocolate cheesecake recipes when doing this. Following my basic cheesecake recipe, I added the chocolate mix-ins and continued with the recipe like normal. (Fair warning: This is still a very rich, and VERY chocolatey, cheesecake! If you want less chocolate flavor, simply reduce or take out the cocoa powder.) While checking out what other people had to say about the chocolate cheesecakes, I came across something interesting, though, that I thought I should pass on to you, my readers… I’ve never had a problem with this happening, but if you mix the batter too much after adding the eggs, it can incorporate too much air into the batter and you could have problems with air bubbles. So, it’s best to add the eggs at the very end and only stir until they are just mixed in. Too much air in the batter can also create a soufflé effect with your cheesecake, causing it to rise and then fall, leaving behind cracks in the top of your beautiful cheesecake. So, I did alter my original recipe to reflect this bit of information…
When it came to the crust, of course, I would be doing the traditional graham cracker crust. Since it was to be resembling the campfire treat, though, I wanted it to be a little more substantial, so I actually did measure out the ingredients for it this time. I also wanted it to be a little bit crunchy, so blind-baked it for just a little bit before adding the batter. If your springform pan leaks, as a lot of them do, I read a really great tip for keeping your crust dry that actually does work! Instead of wrapping layers of foil around your cheesecake pan, which doesn’t always work, use the plastic liners they make for Crock Pots around the outside of your pan. Simply open up the bake and fold down the sides, put the pan of cheesecake into the bag, and fold down the sides some more until the bag is flush with the side of the pan as much as possible. That’s definitely so much easier, and much less messy!
Now, when it came to the topping, I needed something marshmallowy… I tend to think that cheesecakes are rather classy, so I didn’t want to just throw a bunch of marshmallows on top of the thing and call it good. Besides, this was a challenge, so I had to do better than blah pre-made marshmallows! Then I remembered the S’mores Cupcakes I make, and thought how perfectly that marshmallow topping would work on my cheesecake. And, besides, it gave me another reason to use my Crème Brûlée torch! For the garnish, I couldn’t find the little dipping style graham crackers that I’ve purchased in the past, but I did find some other ones that sufficed, in the form of Spongebob Snacking Grahams… So I turned the Spongebob sides of the grahams to the inside and made miniature s’mores to garnish my cheesecake slices! Who can resist tiny-sized s’mores?! Ummm… Nobody!!

The girls’ night was great fun, and, in the end, it really didn’t matter who the real winner of the competition was (ME!!) because there was more than plenty of great food to be eaten and much fun to be had!


Printable Recipe

Chocolate Cheesecake:
2 oz. semi-sweet baking chocolate, coarsely chopped
¼ c. heavy whipping cream
3 (8 oz.) pkg. cream cheese, at room temperature
1 c. white sugar
⅓ c. unsweetened cocoa powder
⅛ c. homemade vanilla extract, or 2 tsp. store-bought vanilla extract
4 eggs, at room temperature

Crust:
2 c. graham cracker crumbs
6 Tbsp. butter, melted

Marshmallow Topping:
8 large egg whites
2 c. white sugar
½ tsp. cream of tartar
1 tsp. pure vanilla extract, optional

Hershey’s Milk Chocolate bars, broken into individual pieces, for garnish (optional)
Bite-size graham cracker pieces, for garnish (optional)
Additional graham cracker crumbs, for garnish (optional)

For the cheesecake batter: In a small saucepan, combine the baking chocolate and the heavy cream and heat over low heat, stirring constantly, until the chocolate is melted and smooth; remove from the heat and set aside to cool slightly.
In the mixing bowl of a stand mixer fitted with the paddle attachment, combine and cream cheese, sugar, and cocoa powder and mix on medium-low/medium speed until thoroughly combined and no lumps remain. Scrape the bottom and sides of the bowl, then add the vanilla extract and the chocolate mixture and beat on low/medium-low until well blended and no streaks remain. Finally, add the eggs, one at a time, and beat on low speed until just blended, scraping the sides and bottom of the bowl if needed. Cover the bowl and allow the batter to sit in the refrigerator overnight.
To make the cheesecake: Preheat oven to 350°. In a medium bowl, mix together the graham cracker crumbs and melted butter until thoroughly combined. Lightly press the mixture onto the bottom and partway up the sides of a 9-inch springform pan. Bake for 10 minutes, then allow the crust to cool; Reduce the oven temperature to 325°.
Pour the cheesecake batter over the crust and place the filled springform pan into a large cake pan or roasting pan, filling the outside pan halfway with water. Place the pan into the preheated oven and bake until the cheesecake is almost set, approximately 1 hour and 30 minutes. Remove the cheesecake from the oven and let it continue to sit in the water bath for about a half hour; remove the springform pan from the water bath and place it in the refrigerator to finish cooling.
For the marshmallow topping: When the cheesecake is completely cooled, place the egg whites, sugar, and cream of tartar in the heatproof bowl of an electric mixer. Set over a saucepan with simmering water and whisk constantly until the sugar is dissolved and the whites are warm to the touch, 3 to 4 minutes. Transfer the bowl to the electric mixer fitted with the whisk attachment, and beat, starting on low speed, gradually increasing to high, until stiff, glossy peaks form, 5 to 7 minutes. Add the vanilla, and mix until combined. Transfer the frosting to a large pastry bag fitted with a large plain round or French tip (I like the Wilton large star tip - #2110). Pipe the frosting in a spiral motion onto the top of the cheesecake, reserving a little extra to pipe around the outside edges and make miniature s’mores, if you’re doing that. Using a kitchen torch, lightly brown the marshmallow topping all around the cheesecake. Pipe some of the remaining topping around the outsides of the cheesecake and sprinkle with extra graham cracker crumbs.
Slice the cheesecake into the desired number of pieces (I think 12 is a nice number) and serve each piece garnished with a piece of Hershey’s candy and bite-size graham cracker pieces. Store any leftover cheesecake, covered well, in the refrigerator.

Wednesday, March 7, 2012

Crock Pot White Chicken Chili

For the first time ever on my blog, I’m posting a recipe for the Crock Pot! It’s kind of surprising, really, because I love all of my slow cookers (Yes, there’s more than one… There are four, to be exact!) and use them fairly regularly. I really used them a lot when I was working full-time and also going to school full-time, because I just never had any time to cook a real meal otherwise and didn’t want to live off of drive-thru food. I would do things like adding frozen chicken breasts and then covering them with chicken broth/stock and cream of chicken soup. Then, I would make some egg noodles or the microwavable rice to go along with it and steam some vegetables really quick. This is how I got by (and retained some semblance of my sanity) for months at a time…
I still use my slow cookers on a regular basis, but not nearly as much as I did at that time. My favorite of all of them is the Crock Pot Smart Pot that I got around Christmastime one year, for only $15! It’s the one I use for soups and stews because it’s so big and can hold pretty much whatever I put in it. (This exact recipe fit in it perfectly, with room to spare even…) And the best thing about slow cookers is that you can put everything for your meal in them, turn them on and leave them on, and don’t have to worry about your house burning down while you’re gone! You can even prepare all of the stuff for your meal the night before, put it in the crock part of the device and stick it in the refrigerator, then put the filled crock right into the heating base the next morning before running out the door. How great is that?!
I came across this recipe for Southwest White Chili a long time ago, via the little recipe cards you find in grocery stores. This particular one was from the McCormick brand, and the picture looked good, so figured it was worth a shot! In all fairness, I did start out following the recipe, kinda, but then realized it needed a little bit of extra work. I tasted the chili after it had been cooking for a few hours and found it to be bland, even though I had added an entire extra can of the green chilies they called for in their recipe. As if that alone wasn’t enough to deter me from ever spending the obscene amount of money on the tiny little can of “chilies” again in the future, the fact that there were unidentifiable objects in my soup as a result of using them sealed the deal. Little orange pieces, which I can only logically identify as carrots? Why are those in my chilies?! And woody pieces of …something that I’m hoping were stems? And big leafy pieces of …something else? What the heck is that from?! From now on, I’ll be substituting a Poblano pepper for every can of diced green chilies a recipe calls for, because then I’ll know what’s in my food! Nobody should ever have to guess what weird things might be in their food when the label doesn’t state anything about carrots and leafy greens… ;-)
Back to the bland, though!
It may be because I rinse and drain all of my beans before adding them (rinsing and draining canned beans reduces the sodium content by approximately 40%), since I’m trying to eat healthier and am ultra aware of sodium contents which can be detrimental to dieting, but I would really prefer to have flavor from other sources than a bunch of added salt. Yes, I could just buy the dry beans and soak them and all of that stuff, but I don’t always think that far ahead - a lot of times, I don’t know what I’m going to make for dinner until that morning or even early afternoon! Needless to say, canned beans are quite convenient. Sadly, not all of the canned beans come in a reduced sodium or no salt added version, though, so the rinsing and draining is as close as I’m going to get without actually soaking my own beans.
The original recipe for this was really more like a soup than a chili, in my opinion… Of course, kidney beans don’t really break down a whole lot, so it’s not like the breaking down of the beans could help thicken the soup. And there wasn’t really much of anything else in there to make it thicker, unless I made a flour thickener and added that, which I didn’t want to do because I’m trying to keep my carb intake within a certain range. So, back to the store I went! While there, I picked up some navy beans, which are smaller, softer, and break down more easily, and some Poblano peppers to help spice things up a bit. At home, I quickly diced up the peppers and added them to the Crock Pot, along with the navy beans, and let it simmer for a little while again. After a couple hours, the beans were starting to break down and thicken my chili, but now it was a little too thick! So, a little more stock went in and the Poblanos definitely added just the right amount of kick. After some slight modifications, I finally have a delicious chicken chili recipe! Perfect for the snowy days we had been having here in northern Wisconsin, where we’ve otherwise been having a very mild winter this year…


Printable Recipe

1 Tbsp. olive oil
½ c. chopped onion
3 lb. boneless, skinless chicken breast, cut into small cubes
4 c. unsalted chicken stock
1-2 Poblano peppers, diced
2 (15.5 oz.) cans cannellini beans, drained and rinsed
2 (16 oz.) can navy beans, rinsed and drained
2 tsp. garlic powder
3 tsp. ground cumin
1 tsp. dried oregano leaves, crushed
1 tsp. dried cilantro leaves, crushed
¼ tsp. cayenne pepper
Fresh cilantro, for garnish
Shredded Pepperjack cheese, for garnish

Heat the oil in a large stockpot over medium heat; add the onion and cook 2 minutes. Add the chicken to the stockpot and cook, stirring often, until the chicken is mostly cooked through. Transfer the onions and chicken to a 5-quart Crock Pot; stir in the diced peppers, all of the beans, and the spices. Cover and let cook in the Crock Pot 4-6 hours on high or 8-10 hours on low. To serve, garnish with fresh cilantro leaves and shredded Pepperjack cheese, if desired.

Monday, February 27, 2012

Meyer Lemon Cheesecake

Hello, to all of my faithful readers! Thank you for sticking around while I've been gone. I would like to apologize for taking so much time away from blogging... Things have been quite hectic around here, and I just couldn't seem to get time to cook and then blog about anything. And I've been trying to eat healthier, which seems to consist of a lot of the same things (or at least very similar things)... The good news is, I've lost 40 pounds in the past few months! I go to the gym 6 days a week every week - I have a workout plan that one of my personal trainer friends is helping me with, which I do every Monday, Wednesday, and Fridy, in addition to 45 minutes of cardio training on those days and then I do an hour of cardio training every Tuesday, Thursday, and Saturday. It's definitely a lot of hard work. It sure didn't take this much work to put the weight on! I think if it took the same amount of effort to gain weight as it does to lose weight, there would be a lot more skinny people... ;-)

Anyways! On to my new recipe!!

Last week, I was at the grocery store and just happened to come across some beautiful little Meyer lemons. Living in northern Wisconsin, I've never seen or had them before, since I don't know anyone who lives in an area where they are grown and who would be willing to send me some. As you might imagine, I had never worked with them before. Needless to say, I was delighted to have come across them and scooped up two bags of the little beauties! Although, now I had to figure out what the heck to do with them, and it had to be something special...
It just so happened that I was talking to one of my good friends (Whom I also happen to think is quite handsome! :-)), and he recommended that I do a cheesecake - he's got quite a sweet tooth and loves desserts. I concurred that it was definitely a good idea, as I love cheesecake too, but I didn't want it to be just a normal cheesecake with merely some zest in there. He also recommended the candied lemon slices on top, which I thought were a great idea! I had never candied an entire lemon slice before, though, so I had to look into how it was done and came across a recipe from Martha Stewart that sounded easy enough. The only thing I did differently was to sprinkle a little bit of extra sugar on top of the lemon slices after they came out of the simple syrup bath.

Now, I just needed to make the cheesecake extra special...

Then, I remembered a project I had worked on last year, for Key Lime Pie Ravioli (which turned out rather spectacularly), and decided to make a Meyer lemon curd. I could swirl some of the curd into the cheesecake and then add a little more on top, after the cheesecake baked and cooled, to help hold the candied lemon slices in place. There are several different recipes floating around the internet for how to best make curd, and I don't remember where I found this one but I've been using it for a while now and have always had good luck with it. Except when I first tried to make orange curd using the same recipe, which requires a little extra acid...


The final product turned out to be quite delicious!


Printable Recipe

Meyer Lemon Curd:
1 c. Meyer lemon juice
4 tsp. Meyer lemon zest
¾ c. sugar
6 large eggs plus 2 egg yolk, room temperature
1½ sticks butter, cut into ½″ chunks

Cheesecake:
3 (8 oz.) pkg. cream cheese, room temperature
1 c. sugar
4 eggs, room temperature
¼ c. brandy vanilla extract, or 2 tsp. pure vanilla extract

Candied Meyer Lemon Slices:
2 Meyer lemons, sliced thinly
1 c. sugar
1 c. water

For the Meyer lemon curd: Whisk together the juice, zest, and sugar in a saucepan over low heat until the sugar dissolves. Whisk the eggs and yolks in another bowl. Once the juice mixture is heated and the sugar is completely dissolved, take approximately 1 cup of the hot liquid and slowly whisk it into the eggs, whisking constantly. Pour the egg mixture slowly into the saucepan, whisking constantly. Add in the butter chunks a half at a time and whisk constantly. Continue whisking, after butter is incorporated, until very thick, about 6 minutes. Remove from heat and pour through a fine mesh strainer into another bowl or other container. Cover the mixture with plastic wrap to prevent a skin from forming and allow to cool 30-40 minutes, then chill for at least an hour or until cold.
For the cheesecake batter: Cream the sugar and cream cheese together in a large bowl until well-blended and the cream cheese has no more lumps. Beat in the eggs and the vanilla, just until smooth and creamy. Cover the bowl and allow the batter to sit overnight.
For the candied lemons: Bring sugar and water to a rolling boil in a medium-size, heavy skillet, stirring to dissolve the sugar. When the liquid is clear and bubbly, reduce heat to medium-low and add the lemon slices in a single layer; simmer until the rinds are translucent. Transfer the lemon slices to baking sheets lined with parchment paper and let cool completely.
To make the cheesecake: Preheat the oven to 325°. Prepare a graham cracker crust and gently press it into the bottom of an assembled 9-inch springform pan; pour the cheesecake batter over the crust. Transfer some of the Meyer lemon curd to a pastry bag fitted with a Bismarck tip (or just use a Ziploc bag with a small hole cut out of one corner) and pipe the curd into the cheesecake batter, making several circles around the pan until you reach the middle. With a toothpick, push the curd down into the cheesecake batter a little more and then cut through the curd and cheesecake to make a pretty pattern, going from the outside of the pan to the middle.
Place the cheesecake into a large cake pan or roasting pan and fill the outside pan halfway with water. Place the pan into the preheated oven and bake until the cheesecake is almost set, approximately 1 hour and 45 minutes. Remove the cheesecake from the oven and let it continue to sit in the water bath for about a half hour; remove the springform pan from the water bath and place in the refrigerator to finish cooling. When the cheesecake is completely cooled, slice it into the desired number of pieces and serve garnished with a little bit of the Meyer lemon curd and some candied Meyer lemon slices.

Friday, December 30, 2011

Ham and Potato Gratin

Ah… Comfort Food… When it comes right down to it, is there anything better than comfort food? Don’t get me wrong, I love trying new, gourmet stuff! And I love experimenting with new recipes and trying different things. But, some days, you just NEED comfort food. I could eat sushi every day of the week and never get sick of it, but I don’t know if that can be considered comfort food… It always makes me happy, though! This time, what I’m talking about is honest-to-goodness, I-remember-when-I-was-little-and-my-mom-used-to-make-this comfort food. Toasted cheese sandwiches with the American cheese slices (always two) and a little bit of butter on the outside to make it brown really nicely, and always a bowl of hot tomato soup to dip your sandwich in. Mom’s extra creamy homemade potato soup with chunks of potatoes and ham. Now that’s some comfort food!
For me, potato gratin falls into the same category. When I eat it, I think of fond memories and get the warm fuzzies. I remember my mother making it when I was younger, but had shied away from it as an adult until just recently, opting for the bland substitute they offer in the red box on the grocery store shelf. I’m not sure why I didn’t make it myself before, but am going to guess it had something to do with the ease and length of preparation. Slicing 2½ pounds of potatoes is quite a daunting task when one doesn’t own a mandaline! (If you don’t already have a good one of these, I would highly recommend getting one. I have the Oneida brand one, from Kohl’s, and it works so well for cutting anything – I especially love the crinkle cutting side for making my own waffle fries. Whichever one you choose, be sure that it comes with different blades so that it is more efficient for and useful to you.)
When looking for the recipe I wanted to use for my potato gratin, I tried a few of them and eventually came up with this one after changing the one that turned out the best for me. I tried ones with Half & Half (which I don’t recommend because the milk and cheese will curdle more easily, leaving you with a weird gloppy mess) and ones with heavy cream. I tried one with different seasonings. I tried layering the potatoes and pouring the cream over them (which doesn’t work out that well for sufficiently coating all of the potatoes). The base that I used is Tyler Florence’s recipe, and then I added a few things and altered a few of them. The fresh thyme in this recipe is truly amazing! When I’m stirring the cream mixture before assembling everything, I like to try to make sure some of the thyme leaves fall off and stay in the sauce. And I like a little more flavor going on in my base, so I added some bay, shallots, and then a little more garlic, which I put through my garlic press - pressing garlic releases more of the juices than simply chopping it, plus it’s fast and easy! After all was said and done, this turned out to be the best potato gratin I’ve had.


Printable Recipe

3 c. heavy cream
3 sprigs fresh thyme
1 bay leaf
1 shallot, chopped
6 garlic cloves, pressed
Salt and pepper, to taste
2½ lb. russet potatoes, cut into ⅛-inch thick slices
1 (16 oz.) pkg. diced ham
1 c. grated Parmesan cheese, divided
1 c. shredded cheddar cheese, divided

Preheat the oven to 375°. Meanwhile, in a medium saucepan, heat up the cream with the thyme, bay leaf, chopped shallot, pressed garlic, salt, and pepper, stirring occasionally. When the mixture is heated, remove and discard the thyme and bay leaf and set the cream aside.
In a large bowl, combine the potatoes, cream mixture, diced ham, and ½ cup of each of the cheeses. Mix until all of the ingredients are thoroughly combined and then divide the potato mixture evenly between four gratin dishes, dividing any remaining cream mixture between the dishes. Set the gratin dishes on a cookie sheet and cover each one with aluminum foil; bake in the preheated oven for 45 minutes, or until the potatoes are tender. Remove the foil from the gratins and sprinkle with some more of the remaining cheeses; broil until the cheese is golden brown and bubbly.

Wednesday, December 21, 2011

Salted Caramel Cheesecake

I LOVE cheesecake. So much so that it’s been my birthday cake for the past 11 years! It started out with my best friend making me a Cherry No-Bake Cheesecake for my 20th birthday, and it’s a tradition that stuck because I love it so much. Over the years it’s evolved into real cheesecake, but there is still usually cherry in it somewhere.
After cherry cheesecake, I would have to say that this is my favorite cheesecake. I came up with the idea to make this the cheesecake of the week at my work, and I’ve made it a couple times since, for private parties and such. It always goes over well! Who doesn’t love the age-old combination of salty and sweet?!
The cheesecake base is just a very simple recipe, as it should always be. I don’t know what the deal is with some recipes calling for you to add flour and a bunch of other stuff, but it’s really not necessary. The graham cracker crust is also pretty straight-forward, except that I don’t always add sugar to mine. I’ve never actually measured how much of those ingredients I use, but I would guess the measurements I listed are accurate. I don’t like an overly dry nor an overly greasy crust, so I only mix enough butter until it just holds together when you press it with your fingers. The caramel sauce is also very basic, but quite delicious. When you put everything together, and then top it with the Fleur de Sel, which you HAVE to use, it’s so amazing! I like to put a little of the caramel sauce on top of the cheesecake and set it back in the refrigerator to cool on top of the cheesecake, saving the rest to drizzle on top, but either way is just fine.
My favorite part about this cheesecake recipe is that the base is so perfect you don’t need to mess with it very much. If you want to have fruit in it, simply warm some berries with a little sugar and lemon juice until they’re softened, then puree the berries and swirl them into the cheesecake. If you simply want it to be another flavor, add that flavor to the already-made batter. I’ve made so many delicious variations from this one base recipe, I can’t even remember all of them… And they always turn out wonderful!


Printable Recipe

Cheesecake:
3 (8 oz.) pkg. cream cheese, room temperature
1 c. sugar
4 eggs, room temperature
1 Tbsp. vanilla

Graham Cracker Crust:
2 c. graham cracker crumbs
6-8 Tbsp. butter, melted

Caramel Topping:
10 Tbsp. butter
⅔ c. firmly packed dark brown sugar
⅔ c. heavy cream
3 tsp. vanilla extract
Fleur de Sel

For the cheesecake: In a large mixing bowl, cream the sugar and cream cheese together until well combined. Slowly mix in the eggs and vanilla until smooth and creamy. Allow the cheesecake batter to sit overnight. (Mix in any flavorings before leaving it to sit overnight, making sure that any additions are also room temperature before being added.)
Preheat the oven to 325°. Prepare the graham cracker crust by mixing graham cracker crumbs and butter until just moistened; gently press the mixture into the bottom and partly up the sides of an assembled springform pan. Pour the cheesecake batter over the graham cracker crust.
Place the filled springform pan into a large pan and fill the outside pan halfway with water. Place the pan into the preheated oven and bake until the cheesecake is almost set in the middle, about an hour and a half. Remove the cheesecake from the oven and let it continue to sit in the water bath for about a half hour. Remove the springform pan from the water bath and place in the refrigerator to continue cooling.
For the caramel topping: Place the butter, brown sugar, and heavy cream in a medium saucepan and stir over low heat until the sugar dissolves; increase heat to medium and bring to a boil, allowing the mixture to boil for a couple minutes. Remove the saucepan from the heat and stir in the vanilla extract. Cool slightly and spoon over the cooled cheesecake. Sprinkle the cheesecake with fleur de sel just before serving.

Friday, November 25, 2011

White and Green Asparagus Gratin

I love asparagus. Steamed. Sauteed with a little butter. Simmered in a cream sauce. However one makes it, I am not opposed to eating it. Just recently, I happened to find some white asparagus at my local market, and it was on sale for the same price as the green stuff! Needless to say, I couldn't pass it up... I had never worked with the stuff before, but I had seen it around (for, usually, a pretty penny) at the stores more than once or twice. Being that it was always more expensive than the green variety, as is the purple variety, I hadn't been able to justify splurging on something that I wasn't sure about. But, since I now found it for the same price, I couldn't very well walk on by!
White asparagus is actually the same species as green, but it's usually kept covered under soil or mulch so that it won't be exposed to the sun, thereby maintaining it's white color. Blah blah blah, chlorophyll borophyll... While doing my research, I did read that the white asparagus is supposed to be more woody than the green and so you are supposed to peel the very outside before preparing it. When I made this recipe, I used it peeled and unpeeled, just because I was curious if it really made a difference, and I didn't notice anything different in the texture. I think that if you let it sit around for a long period of time, then it would start to become woody and tough, much like the green stuff, but if you use it right away it's just fine.
When looking for recipes to use the white asparagus in, there didn't seem to be very many... Or, at least, not many that were truly unique. I've had gratins on the brain for a while now, though, since I insisted on having 6 new gratin dishes! (In my defense, they're not all the exact same! Two of them are black with white polka dots - LOVE!!, two of them are dark blue, and two of them are light blue! :-) You may remember the lighter blue ones from my post about the Chocolate Cherry Crisps...) I had originally considered using a recipe by one of my favorite fellow bloggers, Kevin from Closet Cooking, but decided, in the end, to go with a different one that I had found via the New York Times Diner's Journal blog, written by Elaine Louie. The version that she blogged about was much more grand than mine, but I really wanted to asparagus to be the one and only star of the dish. I used the recipe she posted as a guideline, and then just made it what I really wanted it to be. The sauce part was really what I was most interested in, and it was AMAZING!! I'm not sure if I didn't reduce it as much as I was supposed to, but the sauce wasn't very thick at all... That is really of little consequence, though, as we just dipped pieces of fresh, yummy bread into it to soak it all up. Who doesn't like that?!
I made two batches of this recipe, one the day before and one the day I made it, and they came out with equal results. So, if you're planning to make this for a holiday dinner, it's definitely easy to prepare ahead of time! I left mine sit out at room temperature so that it would have a similar cooking time as the ones I made the same day, but I mixed everything and arranged it in the gratin dishes ahead of time. You could also easily make this in a larger baking dish, making sure to check the asparagus for doneness and all of that, but it may take some extra time. But, I'm sure you could certainly find a way to justify buying a couple of gratin dishes of your very own, too... ;-)


Printable Recipe

1 c. heavy cream
2 shallots, minced
2 sprigs fresh thyme, bundled together
¼ c. dry white wine
Salt and freshly ground black pepper
½ bunch green asparagus; trimmed and cut diagonally into ½-inch slices
½ bunch white asparagus; trimmed, peeled, and cut diagonally into ½-inch slices
1⅛ c. grated Parmesan cheese
¼ c. panko bread crumbs
2 Tbsp. melted butter

Preheat the oven to 400°. In a medium saucepan, combine the cream, shallots, thyme, and wine; place over medium heat and simmer until reduced by half, 20 to 30 minutes. Discard the thyme bundle and season the cream mixture with salt and pepper.
In a large mixing bowl, combine the asparagus, reduced cream, and 1 cup of the Parmesan cheese; mix well and place in two individual (approximately 16 ounce) gratin dishes, or other equal-sized ovenproof baking dish. Sprinkle the remaining Parmesan over the tops of the asparagus. In a small mixing bowl, combine the panko bread crumbs and melted butter; sprinkle the bread crumbs on top of the dishes. Place the gratin dishes on a baking sheet, set in the oven, and bake until the asparagus are tender, the sauce is bubbling, and the bread crumbs are golden brown, 6 to 10 minutes. Serve hot.

Sunday, November 6, 2011

Traditional Italian Tiramisu

Oh, Tiramisu… How I love thee!

I know that there are some (crazy) people out there who do not share my love of this heavenly “pick me up” breakfast snack dessert, but anyone who’s ever had a good tiramisu knows exactly how I feel. I don’t even like coffee unless there is enough sugar and creamer mixed in so that it doesn’t even taste like coffee anymore! But I looooove tiramisu…
I found this recipe in a copy of Cook’s Illustrated Italian Favorites magazine, which I came across at one of my local grocery stores, and was immediately entranced. You can also find the recipe on their website, but you need to be a paying member to access most of their content. I would highly recommend checking them out, especially if you are newer to cooking, as they do offer a lot of good advice and information about many cooking subjects. One of the important things they covered was how to properly dip the ladyfingers in the espresso and rum mixture so that you don’t end up with a soggy dessert – rolling the ladyfingers across the surface of the espresso mixture rather than submerging them in it.
The only thing that I changed about their recipe was the mixture of strong coffee and instant espresso powder, as I don’t think it’s much of an inconvenience anymore for people to find some brewed espresso. There are so many coffee shops that will make the amount you need for the recipe, and at a rather decent price, so there’s really no need to spend a lot of money on the fairly expensive instant espresso. Or, if you own a French coffee press, you can buy regular espresso and brew it in that, which is what I did for this recipe… I have a French press travel mug that I bought for making tea, which also worked out really well for brewing the espresso. My travel mug has two fine strainers which did a pretty good job of keeping the ground espresso in the mug, but you could easily remedy any issues you might have by running it through a coffee filter. Another option is just letting it sit after brewing until it reaches room temperature, and then any particles will settle to the bottom and can be easily discarded. If you don’t want to mess around with any of that, you can also ask them to grind your espresso a little more coarse than normal, which will ensure the grounds stay trapped under the strainer. It’s entirely up to you!
When it comes to the mascarpone, you definitely do not want to try substituting anything else. Cream cheese is NOT the same thing, and will yield different results… It is also important to know that when you’re working with mascarpone it doesn’t behave the same as cream cheese. Mascarpone is much more delicate and requires a little bit more attention and care – if you forget about it and leave it out at room temperature, there’s a very good chance it will break and be un-useable in most recipes. Therefore, you should leave the mascarpone in the refrigerator until you’re ready to use it and return it to the refrigerator if you’re going to be completing other tasks.
I made this tiramisu for my family’s Thanksgiving get-together, as my mama will be in Italy over the holiday, and everyone loved it! Mama may be a little bit biased, siding with me and all, but she said this was the best tiramisu she’s ever had. Even better than what she’s had in Italy! Who am I to disagree with her?! We’ll not say anything about partiality and a mother’s love… ;-)


Printable Recipe

2½ c. prepared espresso, room temperature
9 Tbsp. dark rum
6 large egg yolks
⅔ c. sugar
¼ tsp. table salt
1½ lb. mascarpone cheese
¾ c. cold heavy whipping cream
14 oz. ladyfingers
3½ Tbsp. natural cocoa
¼ c. semisweet or bittersweet chocolate, grated

Stir the espresso and 5 tablespoons of the rum in a wide bowl or baking dish; set aside.
In the bowl of a stand mixer fitted with the whisk attachment, beat the egg yolks at low speed until just combined. Add the sugar and salt and beat at medium-high speed until pale yellow, 1½ to 2 minutes, scraping down bowl with rubber spatula once or twice. Add the remaining 4 tablespoons of rum and beat at medium speed until just combined, 20 to 30 seconds; scrape bowl. Add the mascarpone and beat at medium speed until no lumps remain, 30 to 45 seconds, scraping down bowl once or twice. Transfer mixture to large bowl and set in the refrigerator to keep cool.
In the now-empty mixer bowl (no need to clean bowl), beat the cream at medium speed until frothy, 1 to 1½ minutes. Increase speed to high and continue to beat until cream holds stiff peaks, 1 to 1½ minutes longer. Using a rubber spatula, fold one-third of the whipped cream into the mascarpone mixture to lighten, then gently fold in remaining whipped cream until no white streaks remain. Set mascarpone mixture in the refrigerator again to keep cool.
Working one at a time, drop half of the ladyfingers into the coffee mixture, roll, remove, and transfer to 13 by 9-inch glass or ceramic baking dish. (Do not submerge ladyfingers in coffee mixture; entire process should take no longer than 2 to 3 seconds for each cookie.) Arrange soaked cookies in single layer in baking dish, breaking or trimming ladyfingers as needed to fit neatly into dish.
Spread half of the mascarpone mixture over ladyfingers; use rubber spatula to spread mixture to sides and into corners of dish and smooth surface. Place 2 tablespoons of cocoa in a fine-mesh strainer and dust cocoa over mascarpone.
Repeat the dipping and arrangement of ladyfingers; spread remaining mascarpone mixture over ladyfingers and dust with remaining 1½ tablespoons of cocoa. Wipe the edges of the dish with a dry paper towel, cover with plastic wrap, and refrigerate 6 to 24 hours. Sprinkle with grated chocolate, if using; cut into pieces and serve chilled.

Sunday, October 30, 2011

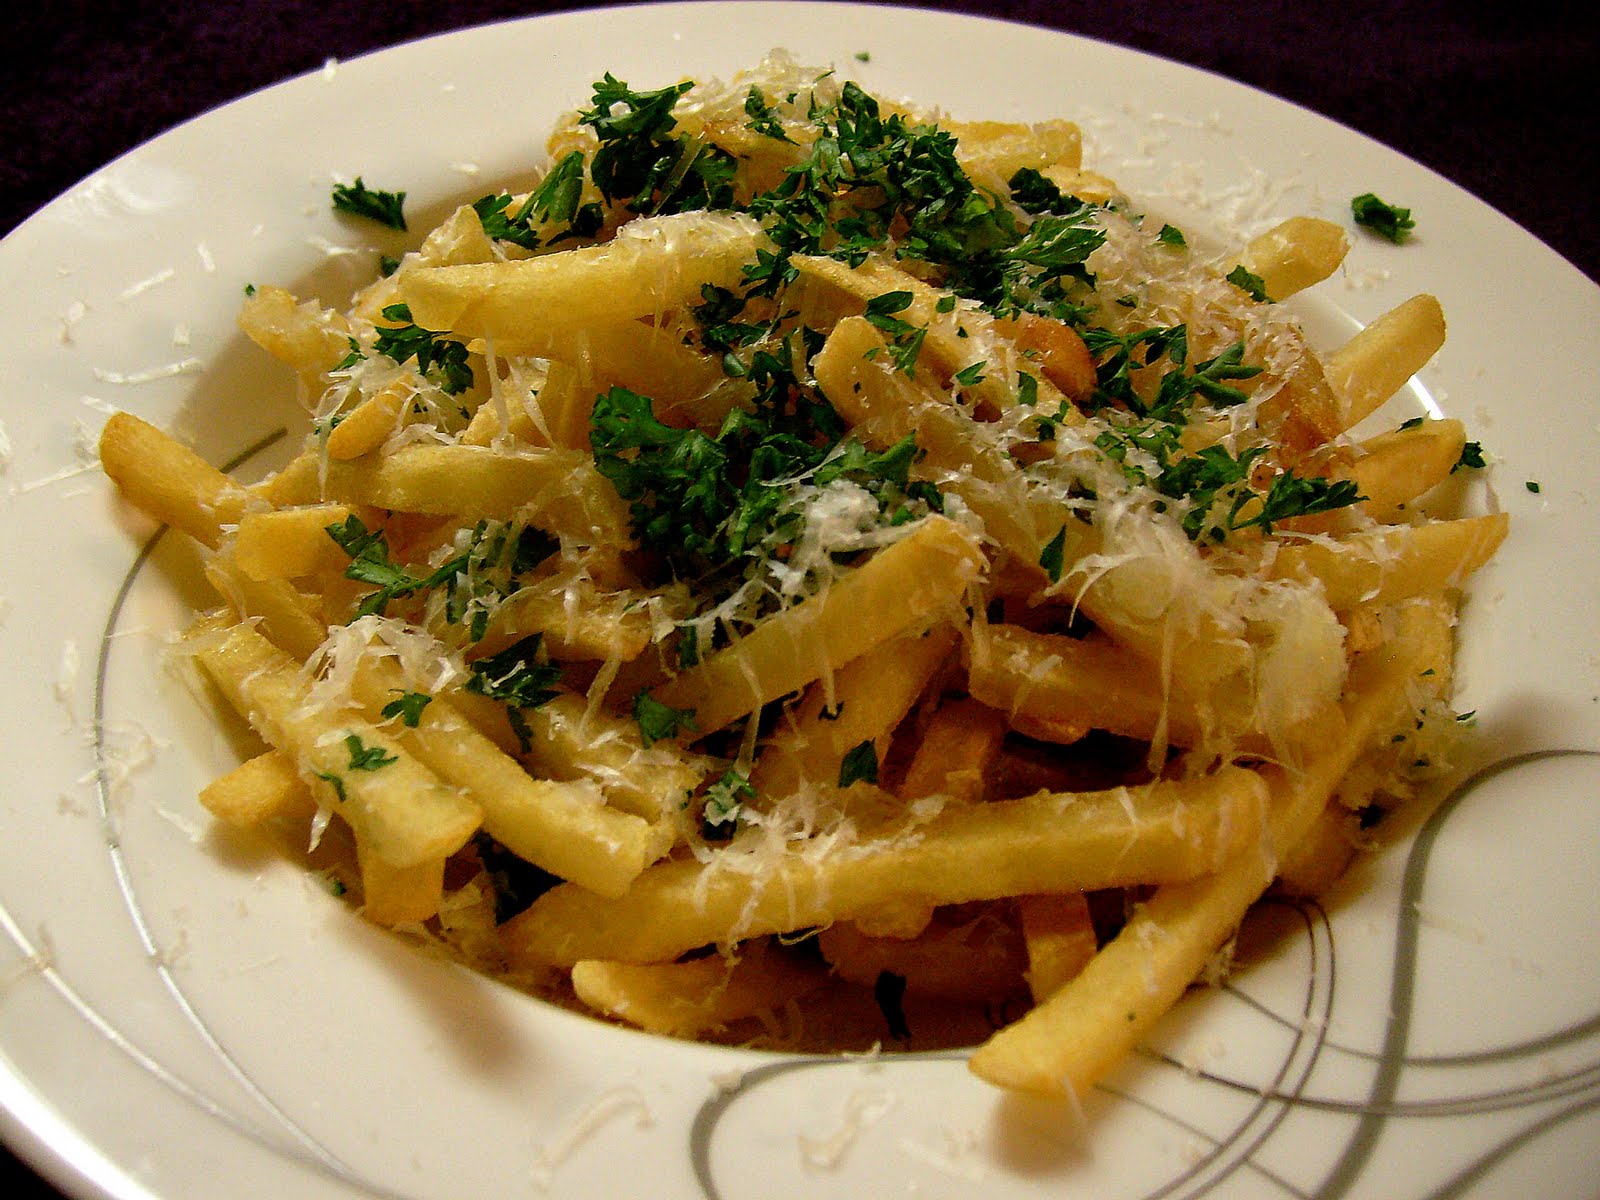
Pommes Frites with Truffle Oil, Parmesan, and Parsley

French fries... Patates frites... Pommes frites... What's the difference?! Well, technically, I guess there really isn't much of one. They all mean the same thing - pieces of deep-fried potatoes. However, after having fries like this while in Milwaukee a few weeks ago, I've researched "pommes frites" and found that they are usually a more gourmet fry, and that there is a traditional format for them. French fries here in America can mean any kind of potato that is deep fried, while "pommes frites" generally refers to a long, slinly sliced strip of potato that is deep fried. In addition, the "pommes frites" are most often served with something a little more ...upscale... than ketchup. Not that there is anything wrong with ketchup on fries!
I had these fries, or something very similar to them, while staying at the Ambassador Hotel in Milwaukee with my cousin for a concert a few weekends ago. These were served in the bar area, Envoy, as a part of their menu, along with several other delicious options, and were very good. If you ever get the chance to stay in the area, it's definitely worth it! And don't let the prices scare you away... I believe these cost around $8 at the restaurant, but you did get a giant pasta bowl full of them!
And while I do prefer to cut my own potatoes and make the fries myself, I would like to note that there are a couple of options if you don't like to mess around with stuff like that, or just don't have the time. McCain and OreIda both make a very good, thin-cut fry that would work wonderfully in place of the freshly cut potatoes.
As for the truffle oil, there aren't a whole lot of gourmet shops near where I live, in Green Bay, but I have found this, and many other goodies, at the TJ MAXX near me. When looking for truffle oil, whether it be white or black, you want to be sure that you're getting real truffle oil, and not just something that smells like it. So, you want to be sure that you look for a product that says it is infused with truffles or truffle extract, and shy away from products that are only made with "truffle essence." Also, you want to be sure to store your truffle oil in a cool, dry space away from direct sunlight so that it does not cause your oil to turn rancid or lose precious flavor.


Printable Recipe

2 large russet potatoes, cut into ¼" by ¼" fries
Oil, for frying
1 -2 tsp. white or black truffle oil
Freshly grated Parmesan cheese
Chopped fresh parsley

To make the fries, preheat a deep fryer or kettle of oil to 350°. Begin by "par-boiling" the cut potatoes in the hot oil just until they are cooked through and limp; transfer to a paper-towel lined plate to drain and cool. Meanwhile, increase the temperature for the oil to 375°. Once the oil is heated, return the fries to the hot oil and cook again until the fries are crispy and light golden brown; transfer to a fresh paper-towel lined plate for just a moment to drain some of the oil and sprinkle with a little salt.
Once the fries are drained, transfer them to a large bowl and drizzle with just a little bit of the truffle oil, tossing to coat; drizzle with a little more of the truffle oil and toss to coat again, until the flavor is to your liking. While the fries are still hot, sprinkle them with freshly grated Parmesan cheese and parsley and toss to coat again. Transfer the fries to a serving dish and finish with more freshly grated Parmesan cheese and parsley.

Wednesday, October 19, 2011

Eggplant Parmesan Sandwiches

The original idea for this sandwich was inspired by a similar sandwich I had at a vegetarian restaurant back home several years ago. I recently checked out their website, and I couldn't find the sandwich on there anymore so am thinking they probably no longer even serve it. I can't remember all of the aspects of the sandwich I had then, but I remember it being pretty amazing! It might sound strange to some of you guys, but I am actually more fond of fruits and vegetables than pretty much anything else. (The only thing that's better than fruits and vegetables is bacon, but that's in a class all by itself!!  :-)) As a child, I was a VERY picky eater and didn't even eat barbecued ribs or any of that stuff until after I was an adult. In fact, I distinctly remember going to KFC with my mother and brothers and sisters and all of them getting the drumsticks while I would not eat anything but the breast meat. I'm still a selective eater, but my tastes have definitely evolved since growing up - I'll most likely try anything at least once!

Anyways, I had entered this recipe in a sandwich contest, but it wasn't chosen so am sharing it with you! You'll have to forgive the picture quality for this picture, as I was house-sitting at the time it was taken and didn't have my little studio set up then... But you can still see the yumminess!

Because I have been trying to eat healthier, I also wanted to say that the eggplant for this sandwich could very easily be oven-fried rather than pan-fried, if you're looking for a healthier option. Simply spray both sides of the breaded eggplant lightly with canola oil and place it on a baking sheet in a preheated 400 degree oven or under a preheated broiler, turning once, until the breading is crispy and the eggplant cooked through. Then, assemble the sandwiches as you would normally! If you are interested in making it any healthier, you could also use egg substitute for the whole eggs, or even substitute some, or all, of the whole eggs with 2 egg whites per whole egg.


Printable Recipe

3 beaten eggs
1 c. flour
¾ c. Italian bread crumbs
¼ c. panko bread crumbs
¼ tsp. sea salt
¼ tsp. freshly ground black pepper
½ tsp. garlic powder
1 Tbsp. dried parsley, crushed
½ tsp. dried basil, crushed
¼ tsp. dried oregano, crushed
1 medium eggplant, sliced on the bias to ¾” - 1" thick
2 ciabatta rolls
Olive oil
1 clove garlic, peeled
Oil, for frying
Freshly shaved or grated Parmesan cheese
8 leaves fresh basil
2 Tbsp. basil pesto
½ c. Tomato Basil pasta sauce
Roasted red peppers
¼ c. shredded mozzarella cheese

Place the eggs, flour, and bread crumbs each in 3 small bowls. Add the salt, pepper, and garlic powder to the eggs and whisk to combine. Season the bread crumbs with the parsley, basil, and oregano and stir with a fork or your hands to thoroughly combine. Dip eggplant slices in egg, then in flour, dip back in egg and then in bread crumbs. Transfer the eggplant pieces to a rack or to paper towels to let them dry slightly before frying.
Preheat the broiler. Slice the ciabatta rolls in half horizontally, brush the insides with a little bit of olive oil, and toast under the broiler just until they’re golden brown. Remove the rolls from under the heat and immediately rub with the peeled garlic. Set aside.
In a deep, heavy skillet or deep fryer heat ½-inch of vegetable oil to 375°. Fry the eggplant pieces, in batches if necessary, for approximately 2 - 3 minutes on each side, or until golden brown and cooked through. Transfer with tongs to paper towels to drain.
To make the sandwiches, arrange the bottom pieces of the rolls on a work surface and spread 1 tablespoon of pesto evenly over the cut surface. Sprinkle with the freshly shaved Parmesan cheese. Lay two basil leaves over the top of the Parmesan and pesto, followed by ⅛ cup of the pasta sauce. Arrange one of the fried eggplant slices on top of the sauce, one per sandwich, and then top with the remaining basil leaves and strips of the roasted bell peppers. Spread the remaining sauce between the sandwiches, topping them with the cheeses. Place the prepared sandwiches under the broiler just until the cheese melts, and then remove from the oven and top with the top half of the roll. Makes 2 sandwiches

Wednesday, October 12, 2011

Zucchini Breakfast Skillet

Wow!! I can't believe I've been away for so long!

First, I would like to thank all of my faithful readers for sticking with me during the past couple of months. It's been quite hectic! And, second, I would like to apologize for being gone so long. At the beginning of September, I moved back into my own place after housesitting for my family during the summer, and so have been working on getting all of my stuff unpacked again (especially all of my precious kitchen stuff). Not to mention, I've been working around 50 hours per week at my new job, and trying to work out and get in better shape again afterwards with my fellow chef, so have been trying to juggle my time there. And, I didn't have internet until the beginning of this week, so that didn't help either!

But, I'm finally back!  :-)

This recipe is another one that I found in a copy of Food Network Magazine that I had picked up at the store, the same one as the Heirloom Tomato Pie I just had to make, so you might have seen it floating around the internet already. But, maybe you haven't!
I especially like this dish, because I'm trying to be more conscious of my diet and want to get back into shape, and this is such a great dish. You don't even feel like you're missing out on everything! Of course, I did change a few things, but I did keep the recipe very much the same as the original... For myself and my family, we like things a little spicy, so I added two jalapenos instead of the one. And I used the special yummy cheese (Morel Mushroom and Leek Jack) I found instead of pepper jack or cheddar. And probably more scallions...  :-D
The great thing about this recipe is that it really is very easy to customize to your liking. If you want it to be a complete breakfast, you could add some bacon to the skillet as well. Served with a couple slices of toast, it's the perfect breakfast!

3 lb. summer squash and/or zucchini
Kosher salt
2 Tbsp. extra-virgin olive oil
4 scallions, thinly sliced, white and green parts separated
1 jalapeno pepper, seeded and minced
3 Tbsp. chopped fresh parsley
¼ tsp. freshly grated nutmeg
Freshly ground pepper
1 Tbsp. unsalted butter
6 large eggs
½ - 1 c. grated pepper jack or sharp white cheddar cheese

Grate the squash into a colander using the large holes of a box grater (or use a food processor fitted with the shredding attachment). Toss with 1 tablespoon salt, then let drain in the sink, 30 to 40 minutes. Roll the squash in a clean kitchen towel and squeeze to remove as much liquid as possible.
Preheat the oven to 375°. Heat the olive oil in a large ovenproof skillet over medium-high heat. Set aside 3 tablespoons scallion greens. Add the remaining scallions (white and green parts), the jalapeno, and salt to taste and cook until the scallions are soft, about 3 minutes. Add the shredded squash and cook, stirring occasionally, until tender, about 7 minutes. Stir in the parsley, nutmeg, and pepper to taste. Cook until the mixture is slightly dry, about 1 more minute. Remove from the heat and let cool, 5 minutes.
Spread the squash evenly in the skillet. Make six 2½-inch-wide indentations in the mixture with the back of a spoon; put ½ teaspoon butter in each one. One at a time, crack each egg into a small bowl and pour into an indentation; season with salt and pepper, and sprinkle with the cheese.
Transfer the skillet to the oven and bake until the egg whites are set and the yolks are cooked to desired doneness, 10 to 12 minutes. Scatter the reserved scallion greens on top.

Sunday, August 21, 2011

"7 Facts" Blog Game

There is a fun game going around the food blogging community called "Seven Facts." If you get tagged by someone, there are seven questions you have to answer using previous posts from your blog. I was tagged by Isabelle, from Isabelle at Home. Thanks for tagging me, this was fun!

Here are my seven answers based on my previous blog posts and experiences. Click on the recipe title to be taken to the recipe link!

~~~~~~~~~~~~~~~~~~~~~~~~~

1. Most Beautiful Post(s): Caprese Salad (or Skewers)


This was probably the hardest decision I made in this game... I'm not saying that I'm the best chef, nor that I make the best food ever, but I've noticed that the quality of my pictures has been improving since I first started blogging.

With this, though, it really was a tough decision. I've made some really yummy things in the past year, and some of the stuff turned out really awesome, so it was hard to choose just one... But, I did get it narrowed down to only two, even though I wanted to do four of them! I LOVE Caprese salads more than just about anything. It's the combination of fresh ingredients and flavors, and the little bit of crunch from the pine nuts (in mine), that just send it over the top. And the scallops with the risotto was so divine, I just had to include that too.  :-)


Since this was the easiest one to choose, based on Blogger's nifty little gadget that tells what my most popular recipes are, this was the first one I completed. Technically, the nifty little gadget says that it's another one of my posts, Trio of Sweet Potato Fries, but I don't know where they're getting that... While all of my fries turned out yummy, there really were not very many comments on them. Unless they count how many times people are viewing them. Maybe?

Anyways...

This was my contribution to the National Day for Ribs and Bacon. What a great day that is!!

~~~~~~~~~~~~~~~


Okay, so I don't know if these were actually controversial, but when I was writing up the recipe for them, I imagined all kinds of New Englanders would somehow find my little blog, and this recipe, and attack me like a pack of dogs on a three-legged cat. It's not the traditional lobster roll format, but it's kinda similar... I like that they toast the outsides of the split-top hot dog buns they use for the rolls. And that's what I meant by the style of this sandwich...

...Even now, I can still see ferocious fangs! :-|

~~~~~~~~~~~~~~~

4. Most Helpful: Honey Ginger Salmon


This is another one of those recipes that didn't get a lot of attention, because it was back in my earlier days of blogging, when only my real-life friends were reading what I wrote. I had recently been told by a fellow blogger about another post that they found especially informative, but I did pack a whole lot of information into this particular post. I try to be as informative as possible when writing up my blogs, so if I forget something or you know something I don't, please feel free to bring it to my attention!

~~~~~~~~~~~~~~~

5. Post That Was Surprisingly Successful: Fish Tacos with Fresh Strawberry Salsa and Chipotle Crema


Perhaps it's because I have so many friends who just can't get their minds around the concept of fish tacos, but I was pleasantly surprised by how popular this was with my fellow foodie bloggers. Apparently, when people hear "Fish Taco," they think of a regular chicken or beef taco, only with fish, with the same spice mixture and everything. *Shudder* I suppose if that were my preconceived notion, I would have a hard time getting past that too... But, they really are very yummy!

~~~~~~~~~~~~~~~

6. Post That Didn't Get The Attention It Deserved: Tarragon Chicken Salad


This is, by far, my favorite chicken salad recipe. The "problem" was that I posted this at the beginning of my blog, when I was just getting started with all of this, and so not a lot of people really saw those earlier posts. One of my residents gave me this recipe, and she was so happy when I would make it and bring some in for her... She was always watching Food Network, especially Barefoot Contessa, and then telling me all about what she saw "Contessa" make in hopes that I would make it and bring some for her! She was a dear, sweet lady.

~~~~~~~~~~~~~~~

7. Post I Am Most Proud Of: French Onion Soup


I am the most proud of this post/recipe, because it was one of my first real attempts at making a recipe my own and it's been so successful. Everyone I've ever made this for raves about how good it is, some even going so far as to say it's the best French Onion Soup they've ever had! This was one of my papa's favorite things, and he absolutely loved it, so this holds a special place in my heart...

~~~~~~~~~~~~~~~~~~~~~~~~~

Thank you so much to Isabelle for including me in this fun game. And now to choose 7 of my favorite food blogging friends to play too... These guys have shown me so much love and support, I can't even begin to thank them enough. Be sure and check out their pages!

Becca at It's Yummilicious
Chelsea at Sprinkles of Parsley
Kelly at Eat Yourself Skinny
Chef Dennis at A Culinary Journey with Chef Dennis (I'm still wanting to call it by your old name!)
Janet at From Cupcakes to Caviar
Christina at Sweet Pea's Kitchen
Amy and Tiffanie at Chicks Who Love To Eat