Showing posts with label Tomatoes. Show all posts

Saturday, December 1, 2012

Green & Gold Grilled Cheese Sandwiches and Tomato Soup

Tomorrow is game day! And, it’s against one of the Green Bay Packers’ biggest rivals – the Vikings!

Here in Green Bay, we finally got our first real snow fall of the season this past weekend! It wasn't much snow, but it was enough to cover the ground and stick for more than 30 seconds. Truthfully, I’m more excited about the snow than the football game… Funny enough, you’d think living in Green Bay would make me a die-hard Packers fan, but that’s not the case. In fact, I’m a Bears fan! (Shhhh! Don’t tell these crazy people!!  ;-)) Although, when my friends ask me to go to a game with them, I try to be a good sport and show some team spirit…
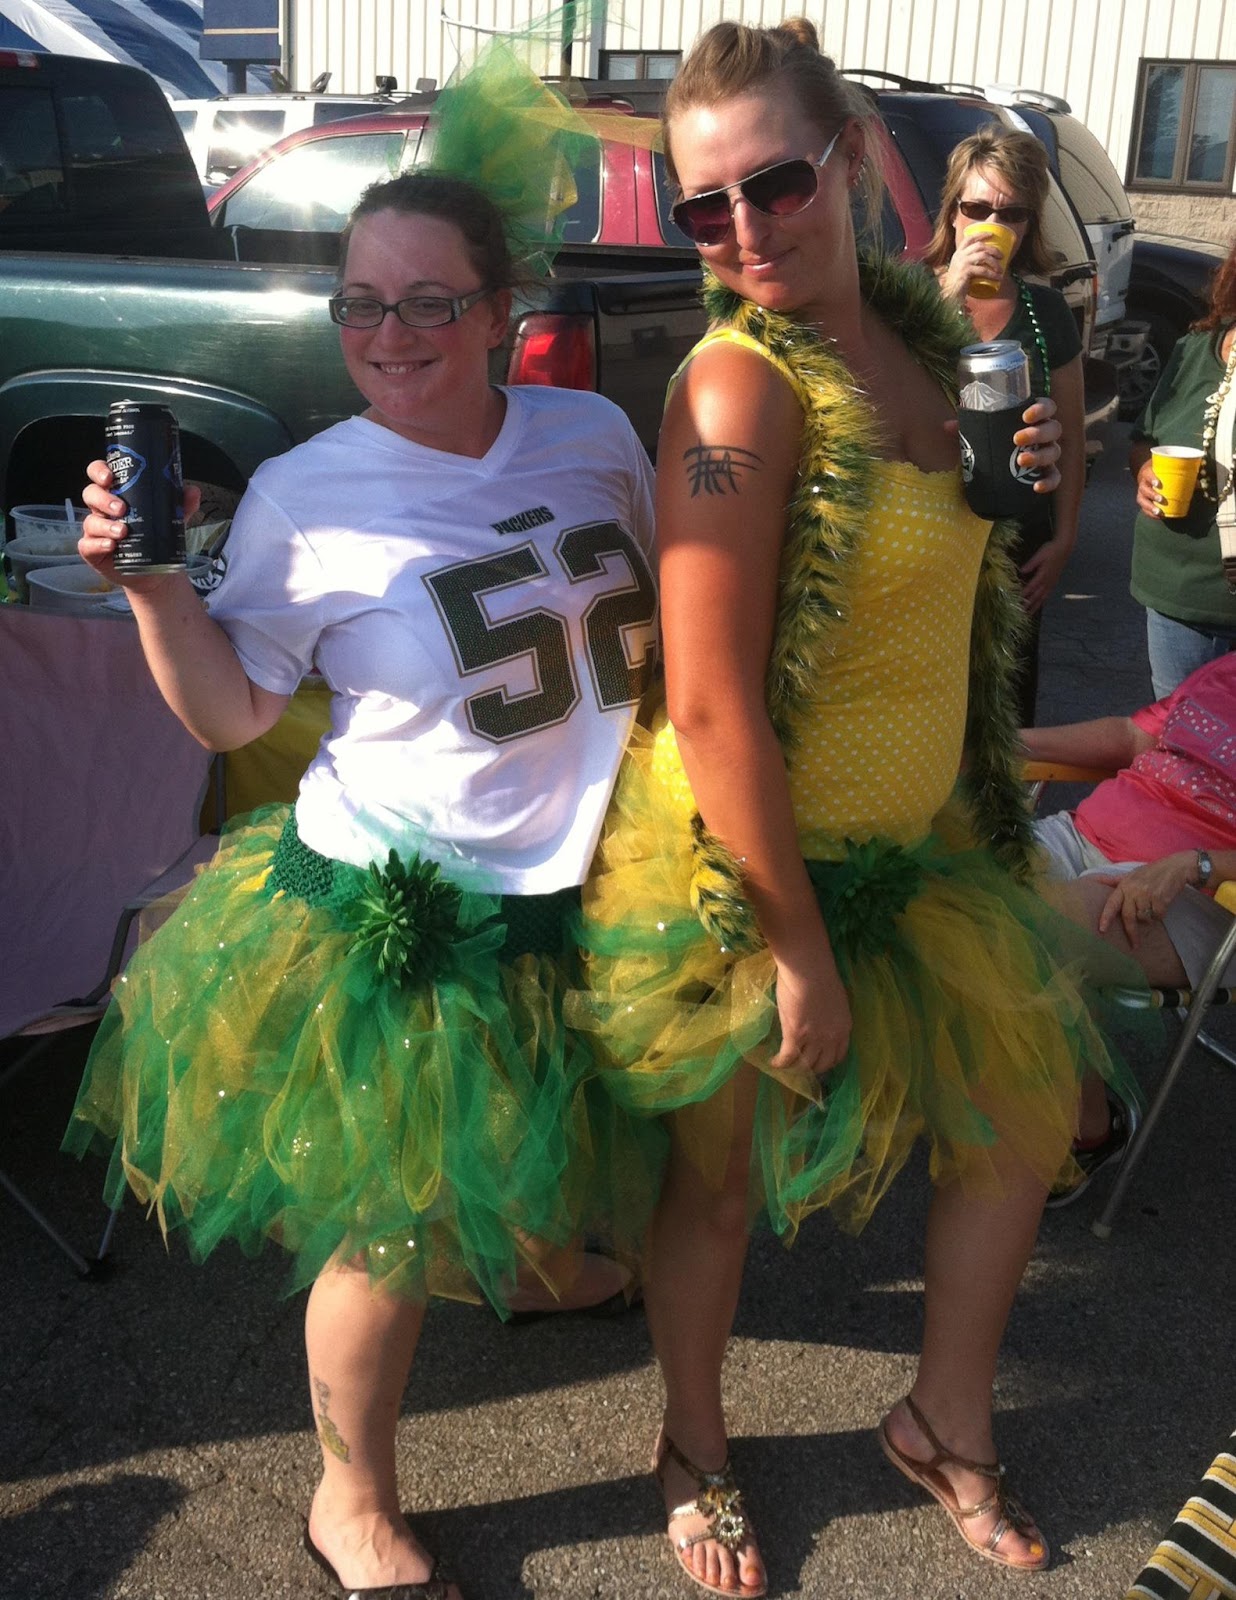

Or, I just like to have any excuse to wear a tutu!!  :-D

I was recently contacted by a man named Brian from the Campbell’s Soup Company, asking if I would be interested in tasting and reviewing one of their newer soups, the Sun-Ripened Yellow Tomato Soup.


While doing this project, I even learned a few things about Campbell’s and the history of condensed soups!


When Brian and I initially talked about this project, he thought it would be kind of fun if I did a play on the classic Grilled Cheese and Tomato Soup combination, but make it Packers-themed. I thought it was definitely a cute idea, and immediately called Ledgeview Gardens and asked if they had any of their yellow tomatoes available. Confirming that they did indeed have some, I headed over there immediately and picked up my tomatoes and some fresh basil.
After going to Ledgeview Gardens, I ran to the grocery store to get the rest of my ingredients, namely the cheese. Living in Wisconsin, we’re pretty lucky because we have probably more cheeses than most people even know about, and they’re readily available at most supermarkets in the larger cities. One of the Wisconsin-local grocery stores, Woodman’s, has probably the most diverse of collection of cheeses of all the stores I've been to, and they carry a lot of Wisconsin-made cheeses. I’m particularly fond of the Belgioioso brand of cheeses, as they consistently produce a great-quality cheese and they’re reasonable priced. For this particular project, I decided to use a Burrata cheese, which usually comes packed in water and is like regular mozzarella on the outside and then has shreds of mozzarella combined with cream on the inside. It’s super soft, but really delicious! I cut the Burrata in half and then scooped out the mozzarella and cream interior to spread on my sandwich, but you can easily substitute regular fresh mozzarella cheese sliced thinly.
Because yellow tomatoes are very mild and much less acidic than their red counterparts, I didn't want to use a cheese that would be too strong and that would overshadow the tomato’s flavor. And since their flavor isn't entirely strong, I also roasted some of them for my sandwiches, to help pronounce their flavor a little more. If you’d like even more flavor, you can always add some dried basil with the salt and pepper, just before roasting the tomatoes, but I really wanted the tomato to shine this time.
As for the soup… It really did have a nice flavor, but I must admit that I actually like the acidity and extra flavor of the red tomatoes. I’m one of those weird people who can (and does) eat tomatoes like an apple, with just a little bit of salt on them! So, for me, I really liked the added flavor dimension that the freshly chopped basil and the basil oil added to the soup. But, if you’re one of those people who can’t eat tomato products because of the high acidity, I would definitely recommend trying this out!


Printable Recipe

2 large, ripe, yellow beefsteak tomatoes
Salt and pepper
Canola or olive oil
1 (10.75 oz.) can Campbell’s Sun-Ripened Yellow Tomato Soup
6 slices potato bread
8 oz. ball fresh mozzarella, sliced thin
Fresh basil leaves, optional

Preheat the oven to 350°. Prepare the tomatoes by chopping one of them into small dices, slicing the other one to approximately a ¼-inch thickness; set aside the diced tomatoes. Place the tomato slices in a single layer on a foil-lined baking sheet, sprinkle with salt and pepper, drizzle with a little bit of canola oil, and place in the preheated oven for 10-15 minutes, until the tomatoes have softened and started to brown slightly around the edges. Remove the tomatoes from the oven and set aside to cool slightly.
Add the contents of the canned soup to a medium saucepan, fill the empty can ¾-full of water, and empty that into the saucepan; stir with a whisk to combine everything thoroughly. Heat the soup over medium heat, stirring occasionally, until the soup is heated through. When the soup is hot, add the diced yellow tomatoes, stirring to combine, and remove from the heat.
Meanwhile, preheat a panini press (or George Foreman grill) and assemble the sandwiches; using the basil butter on the outsides of the bread, layer the sliced mozzarella cheese with the roasted tomatoes. Place the sandwiches on the panini press, buttered sides out, and grill until the bread is toasted and golden brown. Remove the sandwiches from the press and allow the cheese to cool slightly before cutting them; cut the sandwiches into small pieces if you’d like, or however you prefer.
Spoon the soup into 3 bowls, garnishing with a chiffonade of fresh basil leaves and/or the basil oil drizzled on top. Serve the soup with the sandwiches or place the “croutons” on top.

Tuesday, November 20, 2012

Herb-Infused Butter and Oil

Wow!! It sure has been a long time since my last blog post! I would like to sincerely apologize to all of my readers for my absence. For quite a while after I started my new job, I was working 60 hours a week, it went back to normal for a couple of weeks, and then I was right back to working 60 hours again. Not only did my blogging suffer, I no longer had the time or energy to go to the gym and I gained back 20 of the pounds that I had worked so hard to lose.  :-(  But, I left that job, as a result of several issues I had with the level of cleanliness in the kitchen (or lack thereof) and the way the owner and management treated the other employees, so am taking some time to recoup from the long work weeks and get back into doing everything I was doing before!
Funny enough, I actually had this blog post typed up and ready to go last week, was just waiting until I took some more pictures, but Microsoft Word crashed and lost the entire document. Strangely, the two documents I typed up AFTER that were saved just fine, but I didn't have a single word of what I had typed up for this. I looked in all of my temporary files and Recovery files, to no avail. Since then, I've been kind of busy, so it took me a little bit to remember everything I had said so that I could type it up again. Stinkin’ technology, it always fails when you need it most!
This blog post is really special to me. Not because of the recipe included, but because it’s the first one I've done in a long time and I've learned a lot about one of the local businesses in the Green Bay area, and I am excited to share it with all of you!


Ledgeview Gardens has been around for several years, and they have some of the best, freshest produce I've eaten. In the summer months, they have plenty of garden space outside and grow a plethora of fruits, vegetables, and herbs in addition to the farm fresh eggs and free-range chicken they sell. I can even buy my squash blossoms from them, instead of scouring the entire market only to come up empty-handed! But, the very best part about Ledgeview Gardens (for me anyways) is that they also have a fair amount of fresh produce even in the wintertime!! After the regular growing season, until around Christmas, you can buy red and yellow beefsteak tomatoes, red and yellow cherry tomatoes, pole beans, a couple varieties of lettuce, garlic, basil, parsley, English cucumbers, winter squash, three different kinds of sweet potatoes, the farm-fresh eggs, and the free-range chicken. After Christmas, they close down to clean out the greenhouse and getting everything ready for the next growing season, and then you’re able to start buying fresh produce again in the middle of May. I don’t know about anyone else, but I am always thoroughly disgusted with the “fake tomatoes” they sell in the supermarkets, so this place is a godsend for me!


As if it wasn't enough that they have this stuff available, their customer service is stellar! The first day I actually drove out to their farm, Darren was kind enough to show me around their facility and explain to me how everything works. Then, I brought my neighbors later that day, and he also gave them a tour and talked to them about everything he had talked to me about earlier. This was especially great, because my neighbors and I had just been talking about cleaning out my spare bedroom and making it into a greenhouse, so that we could have all kinds of fresh vegetables all year long. We had thought we were going to go with a soil method, but after talking to Darren and his dad, Joe, we’re looking at alternative methods – hydroponics and aquaponics. They use the hydroponic method in their greenhouse for the off-season months, and so they were extremely knowledgeable about what we could do in our homes in, but they also know about aquaponics and have been very helpful in helping us to understand what we need to do to get ready for all of it. I have since been there a few times, and they are always happy to answer any new questions I have about setting up a system in my own home and pointing me in the right direction to go about finding the supplies I’ll need.
If you are in the Green Bay area, I definitely recommend looking up Ledgeview Gardens! However, in the summer months, they are much more easily accessible, as they also sell their produce at a couple of the farmer’s markets. But, they are also happy to have you come out to their farm. The only thing I can think of that would make them better… If they started making and/or selling real bacon!  ;-)

What better way to showcase the fresh basil I bought at Ledgeview Gardens than to infuse it in some butter and oil to use later?! I love infusing herbs into oil, because they last a little bit longer and you can drizzle them on top of many kinds of dishes to complement their flavors. This would be great for another recipe I was going to be making...


¼ lb. (1 stick) unsalted butter, softened
½ c. olive or canola oil
Fresh basil, cilantro, parsley, etc.

For the butter: Place the softened butter in a small bowl. If using basil, stack all of the leaves together, roll them up, and cut them into a chiffonade; for other herbs, roughly chop them. Add the herb/herbs to the butter and mix to thoroughly combine; add more herbs, to taste, if you would like more of the flavor. The butter can be used right away or stored in the refrigerator to maintain freshness.
For the oil: Place the leaves of whichever herb/herbs you’re using in the jar of a blender, pour the oil over the leaves, and pulse the mixture until the leaves are chopped into small pieces. If you want more herb flavor, add more leaves to achieve the desired flavor.

Thursday, August 18, 2011

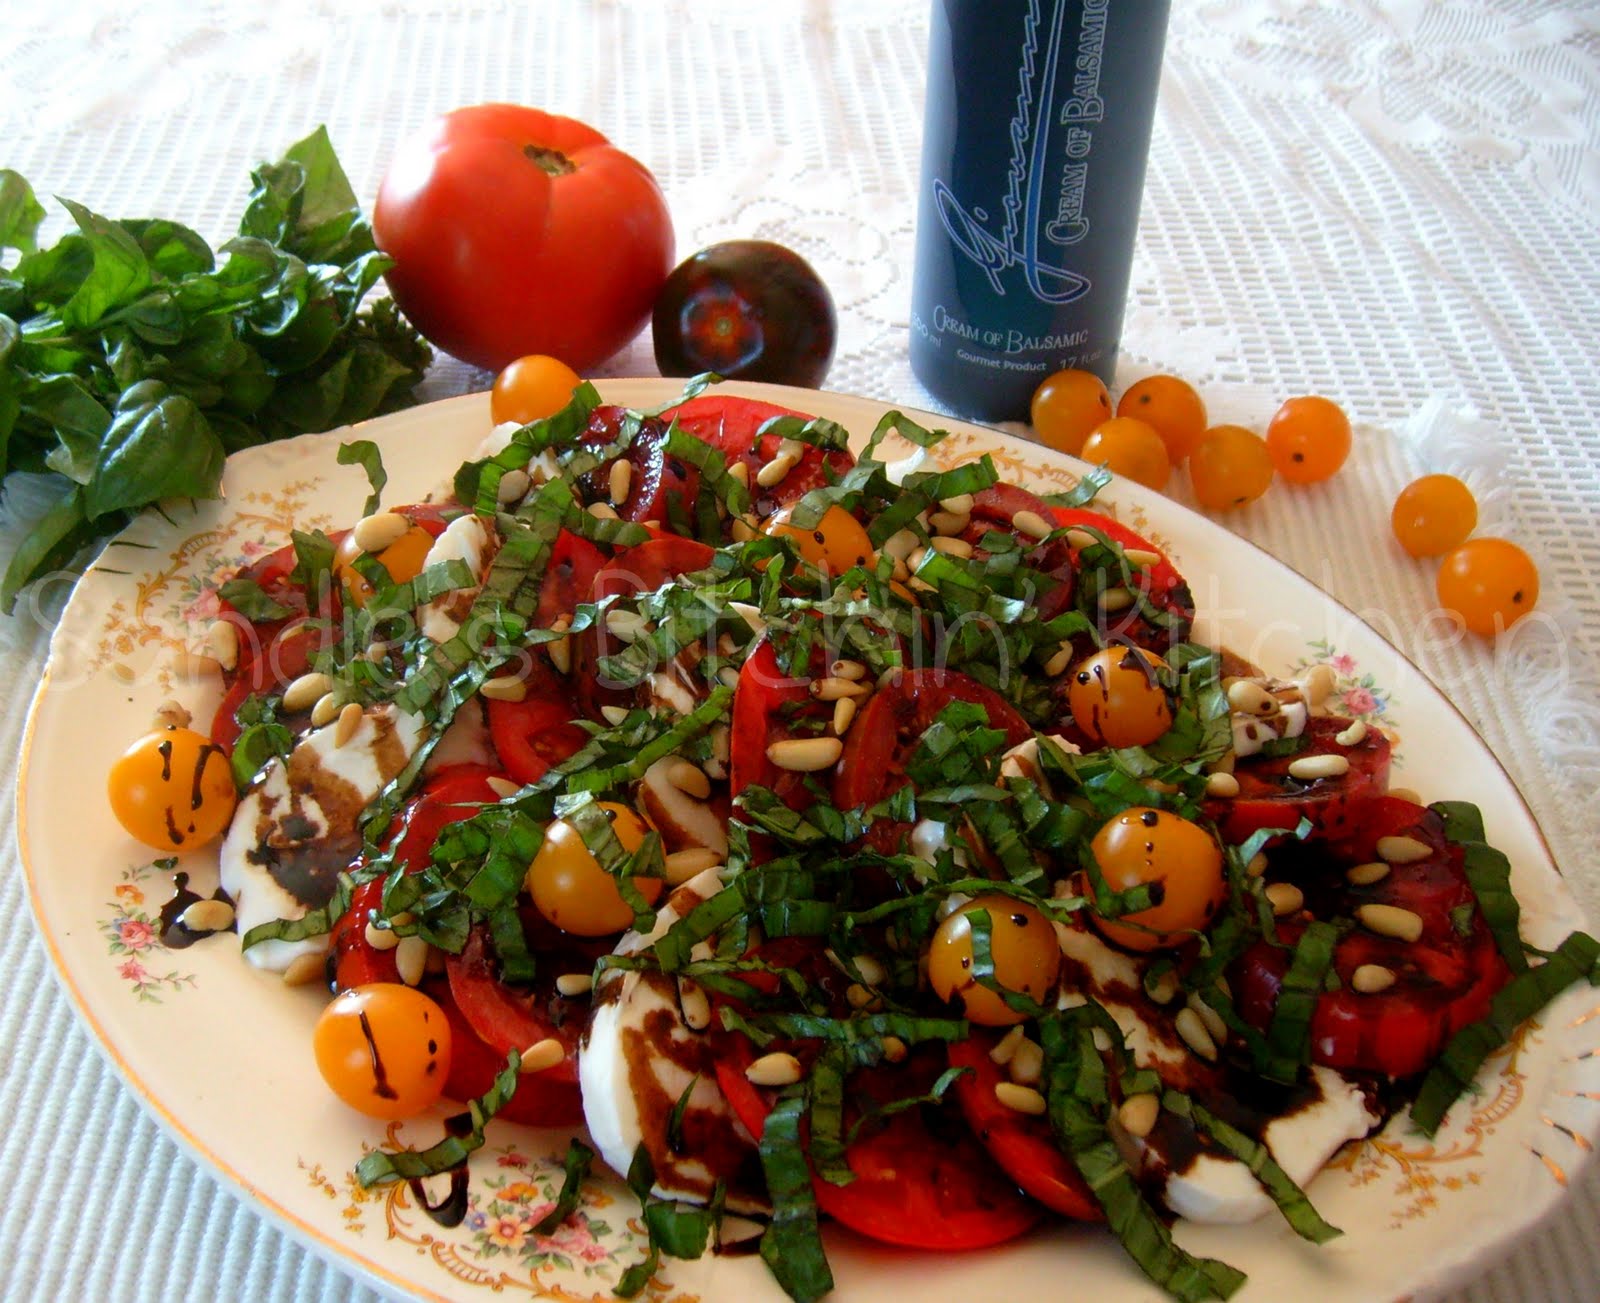
Caprese Salad (or Skewers)

Does anything say summer more than fresh garden tomatoes? Well, besides grilling out, picnics at the beach, water sports, and all of that… But, if you are anything like me, even a little, grilling out doesn’t necessarily indicate summer, as I do that all year ‘round. But, tomatoes are a clear indication of summer. I don’t know about anyone else, but I’ve never seen real, delicious, ripe tomatoes in the middle of winter! (I am seriously of the opinion that someone in my community needs to build a greenhouse to grow fresh produce for all of us during the winter months. It could be like a community co-op kind of thing, where you have to pay so much for the privilege of going there or something, but I think it would definitely be worth it. That’s another story, though…) And how could you not feel in a summery mood with such a beautiful, fresh salad like this? I honestly don’t think it’s possible…
Now, I realize that there are about a million of these “recipes” floating around out there, and about a hundred different ways to arrange them, but these are my little concoctions. I’ve even seen stacked Caprese salads! While visually stunning, it seems to be a waste of time and energy… I mean, you can’t eat a giant stack like that without having to disassemble it and everything before eating it. And I like to enjoy my masterpieces just as they are!! But, the fact of the matter is, pretty much every Caprese salad is the same thing. And that’s just fine with me! These things are so delicious, it doesn’t even matter.
One of my recent favorite ingredients is a balsamic reduction. Yes, you very well CAN make your own reduction, and if you want to I am more than happy for you to do just that. However, these days, I have slightly less time for stuff like that… And there are so many genuinely great products on the market, it seems silly to slave over a hot stove all day when you can have someone else do that for you! The only thing I would highly recommend is that you look for a balsamic reduction that says it’s a product of Italy. Not saying that other people don’t know how to make a good reduction or anything, but it’s a well-known fact that Italians know a thing or two about good balsamic vinegar. The one that I use, and really like, is called Cream of Balsamic and is imported by Isola Imports, which a local gourmet cheese store in my area carries. These guys have a lot of really great products, so I would definitely recommend checking them out, when you have time! (And, no, I am not being paid to say that, nor have I received any other kind of compensation for telling you about them. It’s just a great product and I want to share it with all of you! :-))
As for the basil, that is my favorite herb and I probably overuse it, according to some people’s standards. So, I didn’t give an amount for that, because I want you guys to use as much or as little as you like… The same goes for the pine nuts; use as much or as little as you like. And here’s the thing about pine nuts - they taste TERRIBLE if they’re not fresh! I’m sure other nuts are very much the same, but I can’t remember having any other nuts after they’ve gone rancid. And, for some reason, pine nuts are more susceptible to this than others. If you’ve ever been so unfortunate as to have eaten a rancid pine nut, it will make you dislike them more than just about anything. But, they’re really not so bad if they’re fresh! So, I make it a point to take all nuts and stuff like that from the very back of the shelf… The stockers at the grocery store rotate all of the stuff, so the freshest product is always in the back. With highly perishable stuff (even milk and cheese), I prefer it to be as fresh as possible. Even if people do look at me like I’m some kind of crazy lady for digging all the way to the back of the shelf! :-D

Now, for the skewers, I just bought two containers of tomatoes from the grocery store, one of plain red grape/cherry tomatoes and the other the yellow variety. It never hurts to be colorful! When I bought my mozzarella, I hadn’t had plans for what I was going to do with it (it was on sale), so I bought the container of small ones. For this, if I was planning in advance, I probably would have gotten them a little bit bigger, but it’s more than easy to make do with what you have. And you can arrange them on the skewers however you’d like, and even do more on one skewer, but I thought they looked rather pretty this way. You could cut the basil up and alternate it between layers of mozzarella and tomatoes, though… Or you could decide to only do one tomato and one mozzarella per skewer… Whatever you would like to do with your skewers will be more than okay. Be creative! :-)


Printable Recipe

2 large red (or heirloom) tomatoes
2 heirloom tomatoes
16 oz. fresh mozzarella
Extra Virgin Olive Oil
Balsamic Reduction Sauce
Fresh basil, chiffonaded
Pine Nuts
Salt and pepper

Slice the tomatoes approximately ½-inch thick and set aside; slice the fresh mozzarella to the same thickness and set aside. To arrange the Caprese salad, place one of each of the tomato slices together and arrange however you wish, followed by one slice of mozzarella. Continue arranging the tomatoes and mozzarella until you have no more left or run out of room on the plate. Drizzle a little bit of olive oil over the tomatoes and mozzarella, followed by a fair amount of the balsamic reduction. Sprinkle some fresh basil and pine nuts over the top of the salad, followed by the salt and pepper just before serving.

Saturday, July 16, 2011

Heirloom Tomato Pie

This recipe is definitely not one of my own creations, as I’m sure many of you probably already know, if you’re an avid foodie like me and are captivated by anything food related. It’s like those people who are attracted to shiny things! Food is my shiny thing. :-)
The recipe for this lovely little “pie” comes straight from the glossy pages of Food Network magazine. There was a picture of this on the cover of the most recent edition, and I swear it was taunting me as I was trying to grocery shop. Every time I would go down an aisle and pass it in the checkout stands, I stopped and drooled for a few seconds! The picture on the cover is the only reason I even bought the stinkin’ magazine!! But, I’m glad I did, because there are some really good recipes in there.
Since the farmer’s markets have been back, I’ve been frequenting them often in hopes of finding some beautiful heirloom tomatoes specifically for this pie. Well, on Wednesday, I was a lucky girl indeed! Not only did I manage to find enough little beauties for this pie, but we enjoyed some in salads that night too! However, because of the amount of work required to make this, I didn’t get around to it until last night. And, we had guests from out of town, so it turned out to be the perfect opportunity… I had some more guinea pigs! ;-)
I will have you all know, there was not even a single crumb of this stuff left in the pie plate by the end of the meal. I had promised one of my coworkers that I would bring him some the next time I worked, but that’s not gonna happen now! Next time… Of course, you all know me, so I didn’t follow the recipe exactly. Because I worked in the morning, I opted to use an already prepared pie crust to save on time. (Honestly, I hate rolling out pie crust anyways, so it wasn’t a hard decision for me. Pillsbury is pretty darn good at making pie crusts that taste a lot like homemade, and it’s less frustrating for me, so I go with that instead…) I also did some research, and found that Manchego cheese is ridiculously expensive, so opted for a similar substitute which I really love, Parmesan. And, because this is Wisconsin, you KNOW I didn’t stick with their measurements for cheese! Lol
Actually, at work last week, I was given the opportunity to try a new cheese, Morel Mushroom and Leek Jack, which was really good. So, imagine my surprise and delight when I found it at my local market! I had been telling my mama and sister about it for a few days (and a couple of my friends, too), so decided to pick some up. I cut up some for everyone to sample, and then grated some to mix in with the other cheeses. It was sooooooo good! The heat from the oven helped bring out some of the mushroom and leek flavors, which really complimented the rest of the dish. Of course, if you can’t find it or don’t like mushrooms or leeks (onions), don’t worry about it. Use whatever you like best or something you want to experiment with! And, if you’d like, you can find the original recipe, complete with a crust recipe, on the Food Network website.


Printable Recipe

2 prepared 9-inch pie crusts, unbaked
¾ c. plus 3 Tbsp. shredded Parmesan cheese
2 Tbsp. extra-virgin olive oil
1 large onion, thinly sliced
2¼ lb. mixed heirloom tomatoes
Sea salt
¼ c. shredded mozzarella cheese
1 c. shredded Monterey Jack cheese
¼ c. mayonnaise
3 Tbsp. breadcrumbs
3 Tbsp. chopped fresh chives
3 Tbsp. minced fresh parsley
½ tsp. dried thyme
Freshly ground pepper

For the crust: Place one prepared crust, rolled out into a circle, on your work surface, top with the 3 tablespoons of freshly shredded Parmesan cheese, and place the second crust on top of the cheese; roll the crusts out together into a 13-inch round. Transfer the dough to a 9½-inch deep-dish pie plate. Fold the overhang under itself and crimp the edges; pierce the bottom of the crust all over with a fork and refrigerate until firm, about 20 minutes. Meanwhile, preheat the oven to 350°.
Line the crust with foil, then fill with dried beans. Bake until the edges are golden, about 20 minutes. Remove the foil and beans and continue baking until golden all over, 10 to 15 more minutes. Transfer to a rack to cool.
Make the filling: Heat 1 tablespoon olive oil in a large skillet over medium heat. Add the onion and cook, stirring, until they are caramelized, about 25 minutes. Let cool. Meanwhile, thinly slice the tomatoes; sprinkle with 1 teaspoon of sea salt in a colander. Let the tomatoes drain, gently turning occasionally, about 30 minutes. Place the tomatoes on a clean kitchen towel or paper towels to dry off some of the liquid.
Increase the oven temperature to 375°. Combine the remaining 3/4 cup Parmesan, the mozzarella, Monterey Jack, mayonnaise, breadcrumbs, 2 tablespoons each chives and parsley, the thyme, ¼ teaspoon each kosher salt and pepper, and the sautéed onion in a bowl; spread in the crust. Arrange the tomatoes on top of the cheese mixture and drizzle with the remaining 1 tablespoon olive oil and season with pepper. Cover the edges of the pie crust with foil or pie crust shields and bake until the tomatoes are browned, about 50 minutes. Top with the remaining 1 tablespoon each chives and parsley.

Sunday, January 2, 2011

"Just Right" Spicy Chili

For as long as I can remember, I have always liked spicy foods. In fact, I remember while I was growing up, my mother would always make two pots of chili for the family, one that wasn't very spicy at all for herself and my brothers and sisters while the other was extra spicy for my stepdad and me. I can remember my uncle Mike bringing potato chips for me on a regular basis that were extra crunchy and jalapeño flavored. Even as an adult, I love spicy food, going so far as to put red pepper flakes on my macaroni and cheese, hot pepper sauce and Cajun seasoning on my pizzas, and continuing to spice up my chili.
Of course, everybody has their own ideas about what good chili really is... Some people insist that if you add macaroni then it's no longer chili, but goulash. Some people don't like kidney beans or chili beans. Some people put corn in theirs. Some people make a tomato-based chili, while others have more of a broth base, and still others are cream-based. It really is all a matter of personal preference! But since this is the kind of chili I grew up eating, I'm somewhat partial to this method of preparation. Although, I do add some stuff that I'm pretty sure my mother didn't think to add back in those days, like chorizo sausage... If you've never had chorizo, it's a spicy, Mexican-style sausage, and I really like the added layer of flavor this gives to certain things, like chili. Depending on where you live, you can sometimes get it right from your local grocery store's meat department, where it's usually made fresh. And, depending on my mood, I eat my chili with macaroni. If I'm not in the mood for macaroni, though, it's definitely sour cream, diced avocado, and shredded cheese or cheese curds on top! YUM!!
One of the best things about chili is that you can make a ton of it and it tastes just as good, if not better, the next day. It also freezes really well, without any noodles in it, so you can make a lot of it and then save some of it for a later time. Another thing that's convenient about it, unlike some other soups, is that you can prepare all of the stuff beforehand and then put everything in a slow cooker to simmer all day.


1 lb. ground sirloin
1 raw chorizo sausage, casing removed
½ medium onion, chopped
1 (64 oz.) container tomato juice
1 (15 oz.) can tomato sauce
1 (28 oz.) can diced tomatoes
1 (15 oz.) can spicy chili beans
1 (16 oz.) can kidney beans
1 (2.87 oz.) container chili powder
2 - 4 Tbsp. red pepper flakes
Cooked macaroni, optional
Shredded cheese, optional
Sour cream, optional
Diced avocado, optional

In a large dutch oven or stockpot, combine the hamburger, chorizo sausage, and onion; salt and pepper to taste. Cook over medium heat, stirring occasionally, until the chorizo is cooked through and all of the meat is browned and the onion translucent. When the meat is cooked through, add the tomato juice and sauce, diced tomatoes, chili and kidney beans, chili powder, and red pepper flakes (crush the red pepper flakes a little in your hands before adding to the chili, as this helps to release the flavors and oils in the dried seeds). Allow to simmer on medium heat for at least 30 minutes to allow the flavors to marry and yummify; the longer it simmers, the better it gets. (This would be a good time to transfer the chili to a slow cooker if you want it to simmer all day.) Serve the chili over macaroni and/or with any of the other additional toppings.